
There are lots of things that we have to complete in a day. Some things must be done regularly. What if somehow you forget to complete any of the things that are most important to you? At that time, we might wish that it was good if I could write all the things in a note.
So, to not let you forget any of your essential tasks, here we have something interesting for you. You can find here everything about Google Keep which helps you to get things done.
To know more about its features and its function, here you will get Everything You Need To Know About Google Keep.
All About Google Keep Android App

Google Keep is an app that lets you take notes, and tasks, and do things quickly. It lets you take notes including text, images, recording, and more.
Availability
The Google Keep was launched on 20 March 2013 & available for almost all smartphones including Android, Web & iOS devices.
As here we are discussing the Android app, we will let you know its availability. For Android users, this note-taking app will be available from the Play Store. It costs you zero to download.
It will be compatible with all Android devices. The size and the compatible OS for this app will be varied with the devices.

Features
Google Keep lets you take notes and tasks that need to be done within a specific period. Also, you can add a to-do list to it to know and manage all your to-do things. It lets you set the time and reminder for each note you are taking in it.
Once you have done the things, you can also mark them as completed. It provides various options to share the notes with others including all the major sharing platforms.
Add the collaborator to the notes
Alongside the simple text, you can also add images and drawings directly from the device storage. It lets you add the collaborator to the notes when you want to share it with only a specific person. Adding a collaborator will let you both know which things are done or which are remaining. You can reach your notes through many devices like Mobile, Tablet, Android Watch, PC, and Web Browser.
To keep your important note always on the top, the app offers the Pin feature. Just pin the note and it will never go away from your eyes every time you open the app.
You can also copy the notes to Google Docs. It allows you to add colours and drawings for easy customization. To add the note, you can also have a voice recording. Just speak what you want to add and you will have a new note in seconds.
Adding a New Note
With Google Keep, it is very easy to take a note. It will take you very little time. What you need to do is follow the below steps.
- First of all, make sure that you have downloaded the Google Keep app on your mobile. If not, then download it from the Play Store and let the app install on the device.
- Now, open “Google Keep”.
- On the main screen, look at the bottom.

- You can see Take a note… text along with four options Three Lines with Tick Boxes, Pen, Voice Recorder, and Camera.
- Now, to add a note simply, write something that you want to save.
- Then, come back and your note will be saved automatically.
Create Tasklist
Google Keep is also one of the Best To-Do List Apps. It lets you create a To-Do list with so much ease. Many apps let you create a to-do list. But, when it comes to the Google-owned app, none can beat it.
With Google Keep, you can also add a note like a to-do list. Also, you can convert a simple note into a to-do list. Just check out the below steps to do so.
- Open the Google Keep App.
- On the next display, look at the bottom.
- You can see there Take a note… text along with four options Three Lines with Tick Boxes, Pen, Voice Recorder, and Camera.
- Here, to add a note with tick boxes, tap on the Three Lines with Tick Boxes option.
- Next, start to add the things that you want to save as a to-do list.
After completing those tasks, it is also easy to remove them from the list. Just, tap on the tick box and it will be removed from the list.
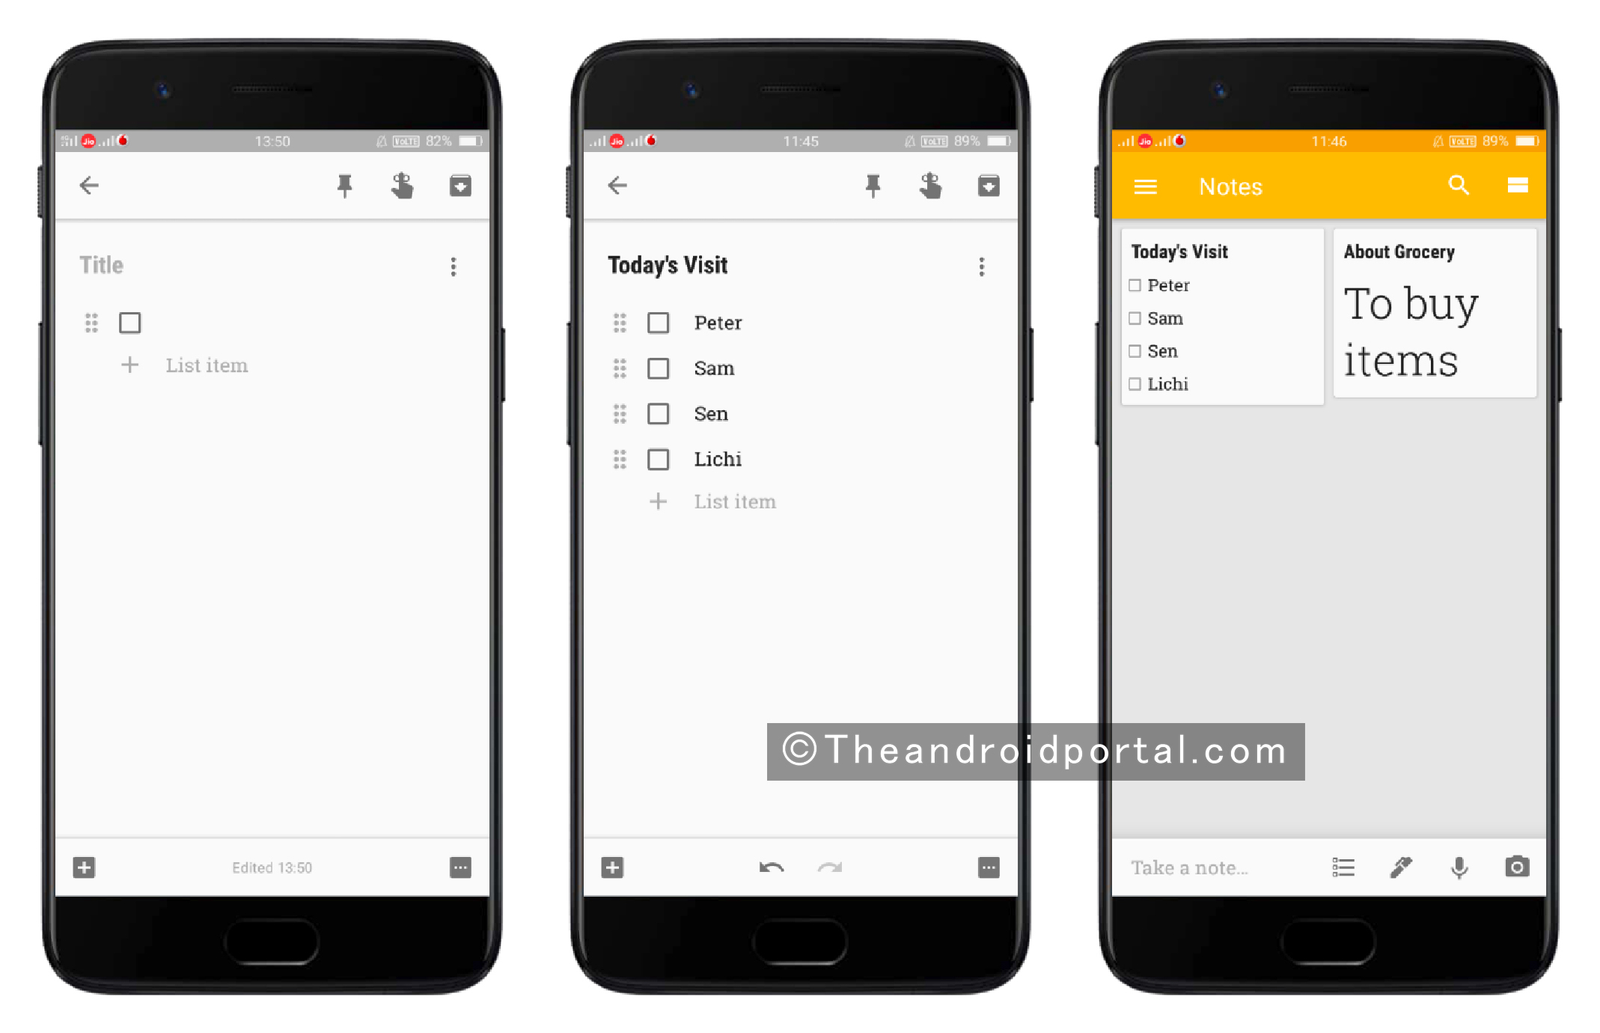
To add the tick boxes in the simple notes:
- Open the Note.
- Now, at the bottom, you can see two more signs + and … at each corner.
- Here, tap on the + sign which is on the left side.
- It will offer options including Taking photos, Choosing images, Drawing, Recording, and Tick boxes.
- To add the tick boxes, tap on the Tick boxes.
Now, you can have tick boxes in the note.
Customizing a Note
(Add Image, Drawing, Recording, Color, and Labels)
Not only the notes, but their customization is also easy. What does it mean the word customization? In simple words, we can say that the editing of the notes. Sometimes, we might be running short of time while taking notes.
At that time, it allows you to customize the note after saving it. This is what the below steps suggest.
The steps will let you know how to add images, drawings, recordings, colours, and labels to the notes as customization.
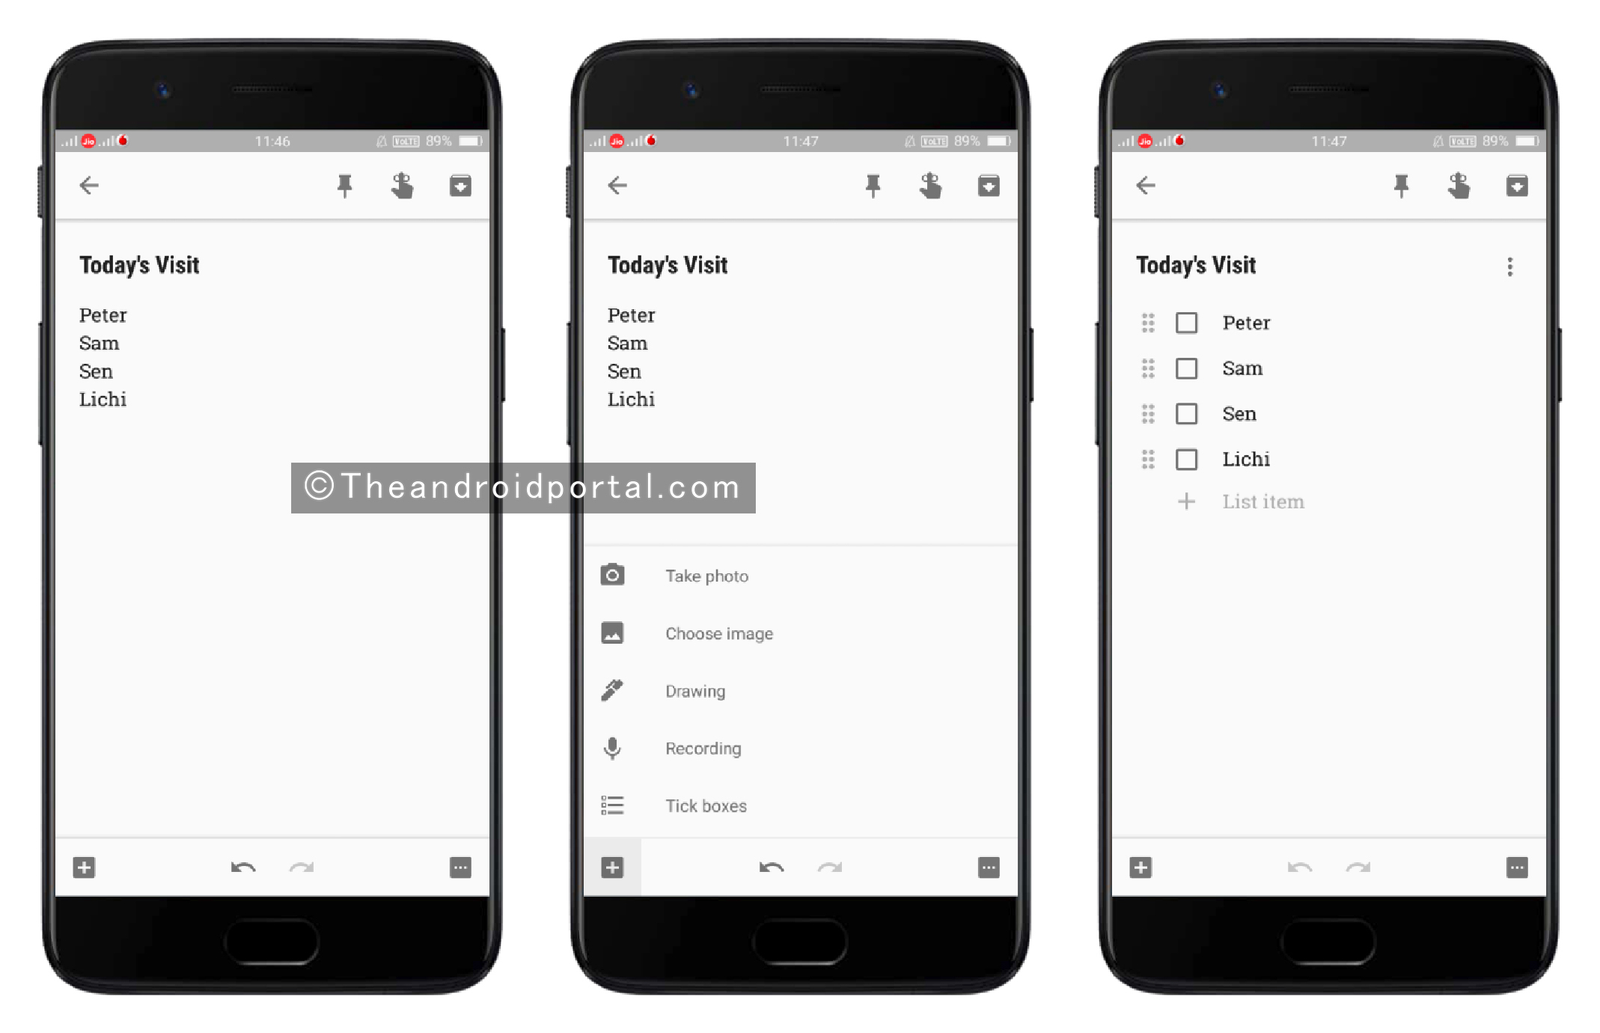
To add the images, drawings, and recording:
- Pick the Note that you want to edit.
- At the bottom, you can see two more signs + and … at each corner.
- Here, tap on the + sign which is on the left side.
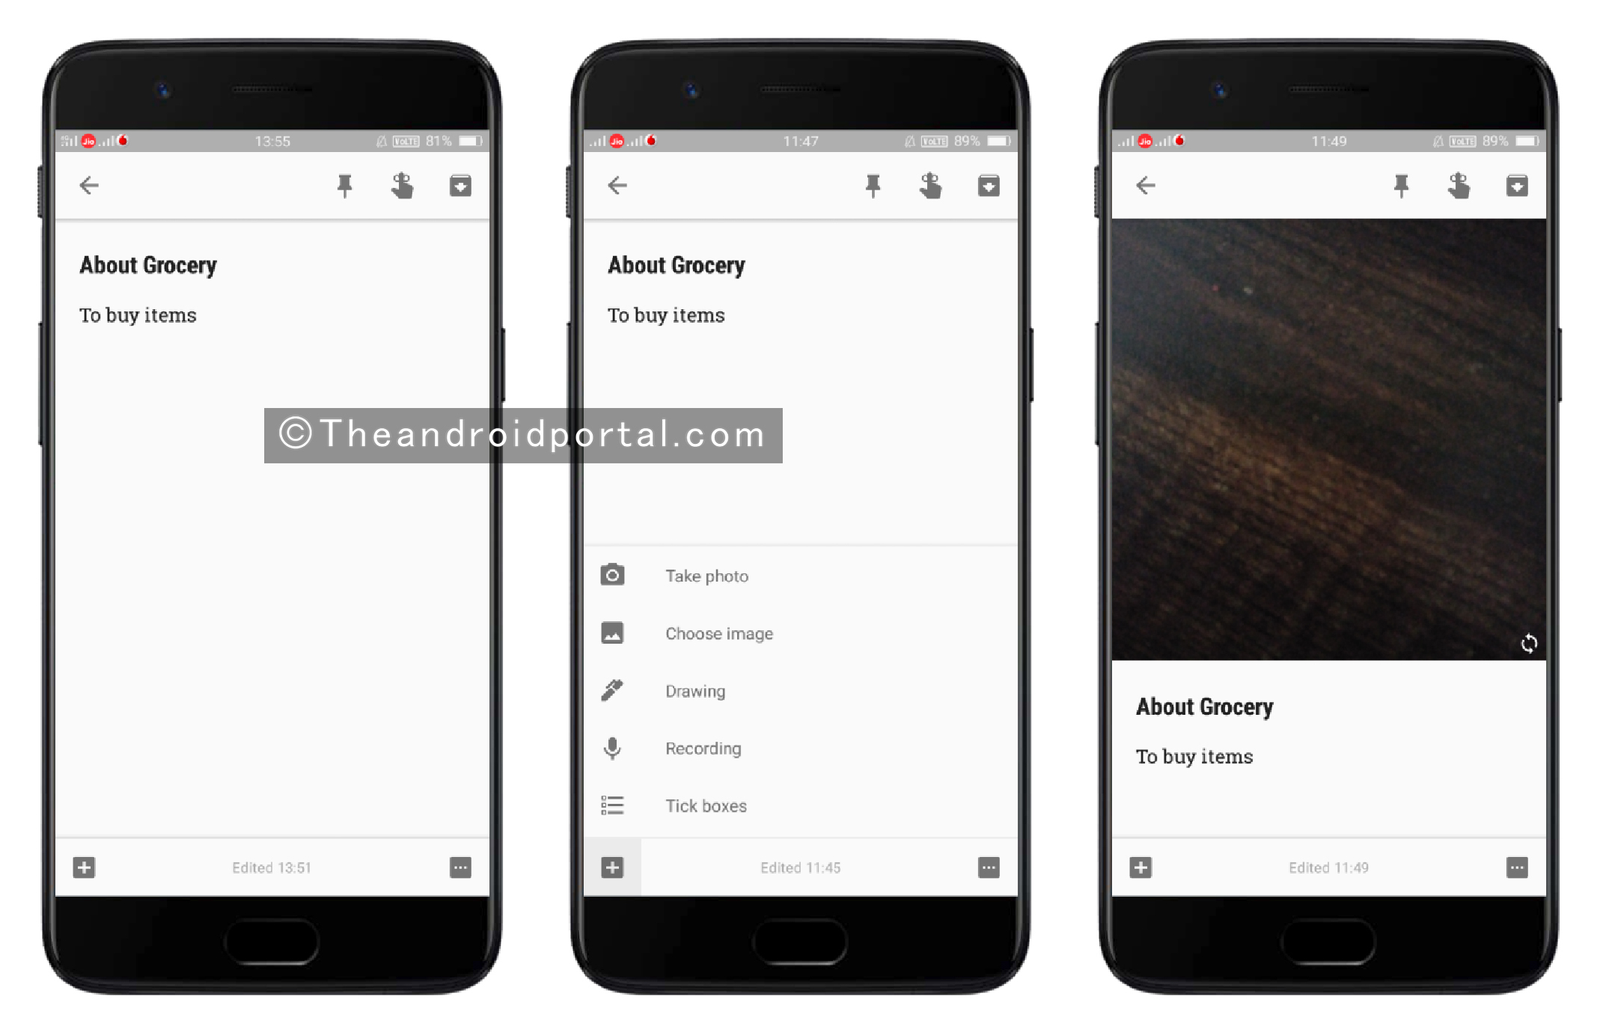
- It contains options like Take Photo, Choose Image, Drawing, Recording, and Tick Boxes.
- Using all these options, you can add the relevant items to the existing notes.
To add the colour and labels,
- Pick the Note that you want to make coloured and add a label.
- There are two more signs + and … at each corner at the bottom.
- Here, tap on the … which is on the right side.
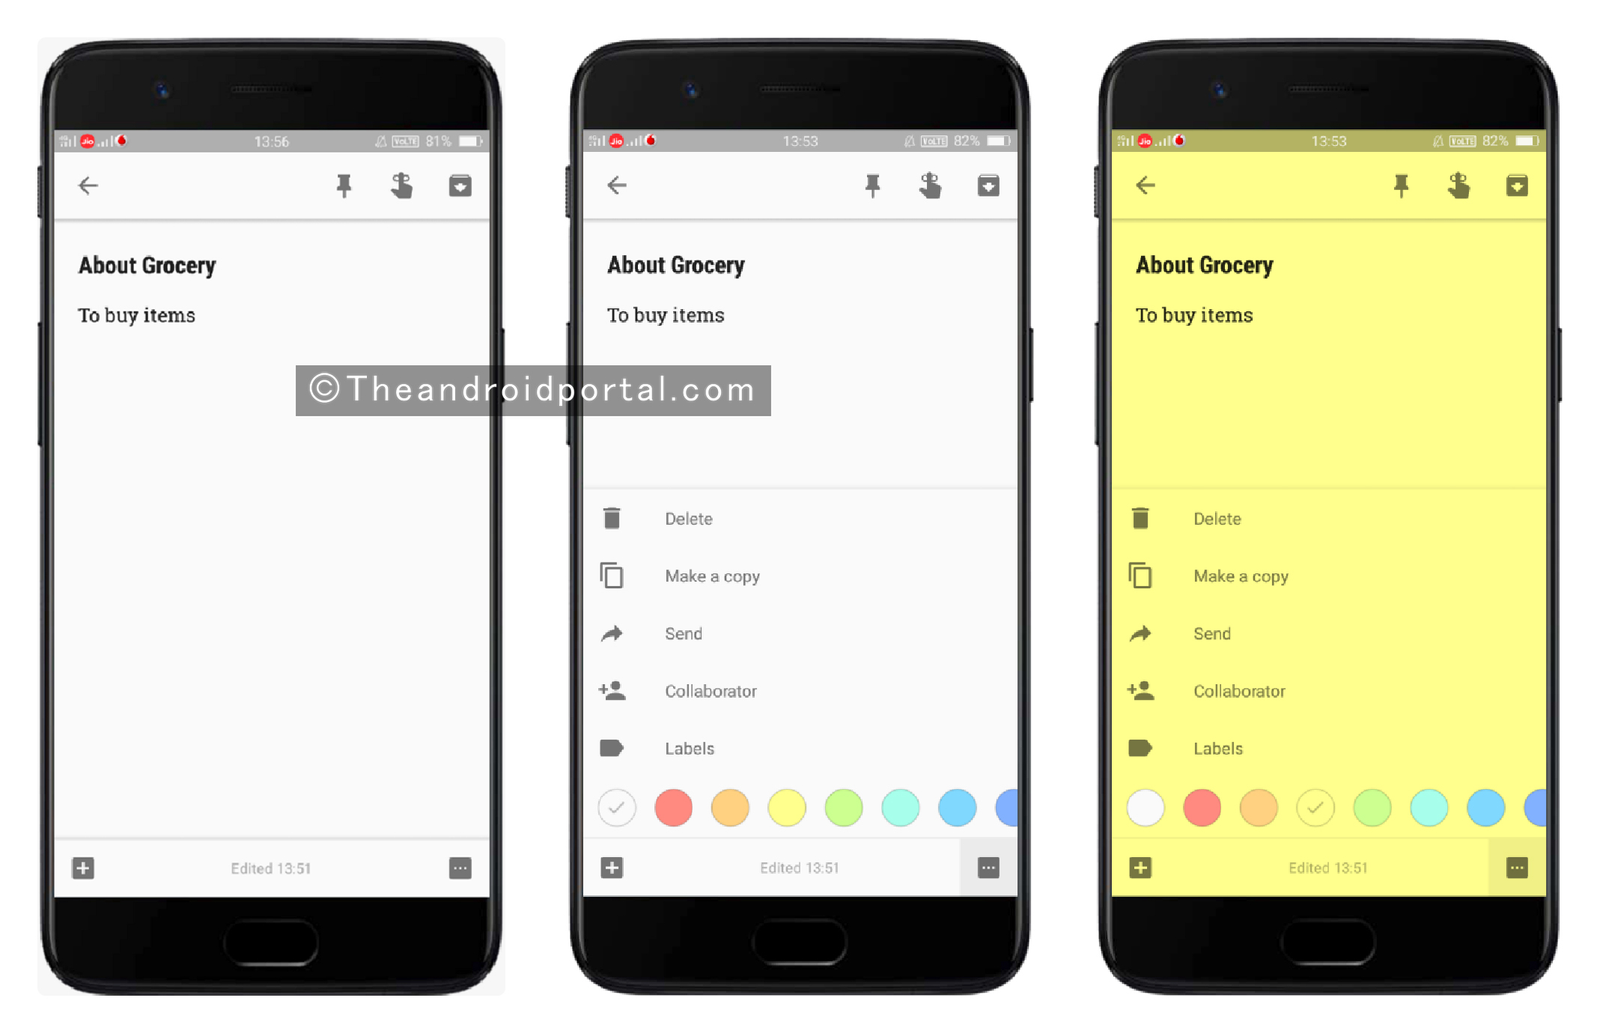
- It brings some options including Delete, Make a Copy, Send, Collaborator, and Labels.
- Using the Labels, add the label to the note.
- Below the Labels option, you can see many of the colours to make the notes coloured.
You can add the new label by adding the # ahead of the label name.
Organize your notes with labels
You can organize all Keep Notes with a label in the Google Keep app. Also, you can filter your notes using a label. Now follow these simple steps to add a label to your Google Keep note.
- Open the Google Keep app on your Android device
- Now Open Note that you want to add a label

- Here, you have to tap on the “Action icon” on the bottom right side of the screen
- Type your new label here, and also you can use existing labels that you have utilized in another note.
You can also add labels using hashtag symbols, and only you have to type a (#) symbol in your note and keep bringing up all available labels. Follow these simple steps to add a label using the hashtag symbol.
- Open a Note in Google Keep that you want to add a label
- Now type a hashtag symbol “#“.

- After typing the hashtag symbol, you can see all available labels on the screen
- Now choose a label that you want to add to your note to keep
Use Keep as a bookmarking tool
You can also use Google Keep as a bookmarking tool on any Android phone. With Google Keep, you don’t need a special tool to save all bookmarks. Now follow these simple steps to use and keep as a bookmark.

- Tap on the Menu icon from the Google Chrome app to save a website address to Keep
- Here, you have to choose the “Share” option
- In the Share via a window, select “Keep” App to save the website address
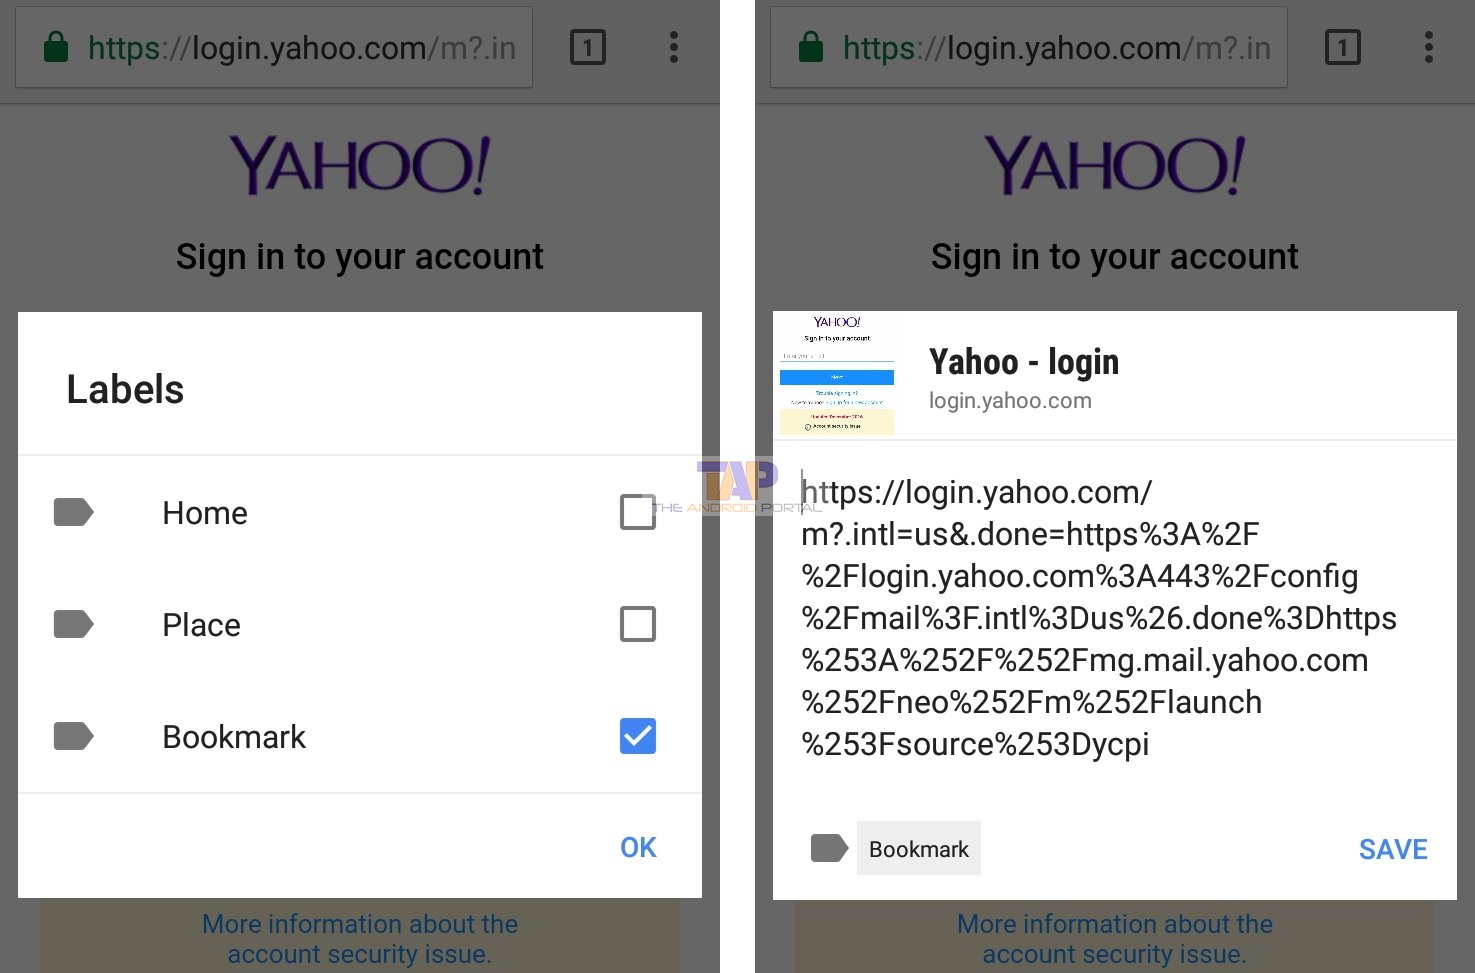
- Now tap the label icon, and type Bookmark, or also you can select bookmark label
- Then, tap on the “Save” button to add the website address as a note in Keep
Add drawing note in Keep
Yes, you can add drawing notes in Google Keep the app. You can create Drawing notes in keep using three modes Pen, Marker, and Highlight. With the three modes, you can create or draw digitally. To create a drawing Keep following these simple steps.
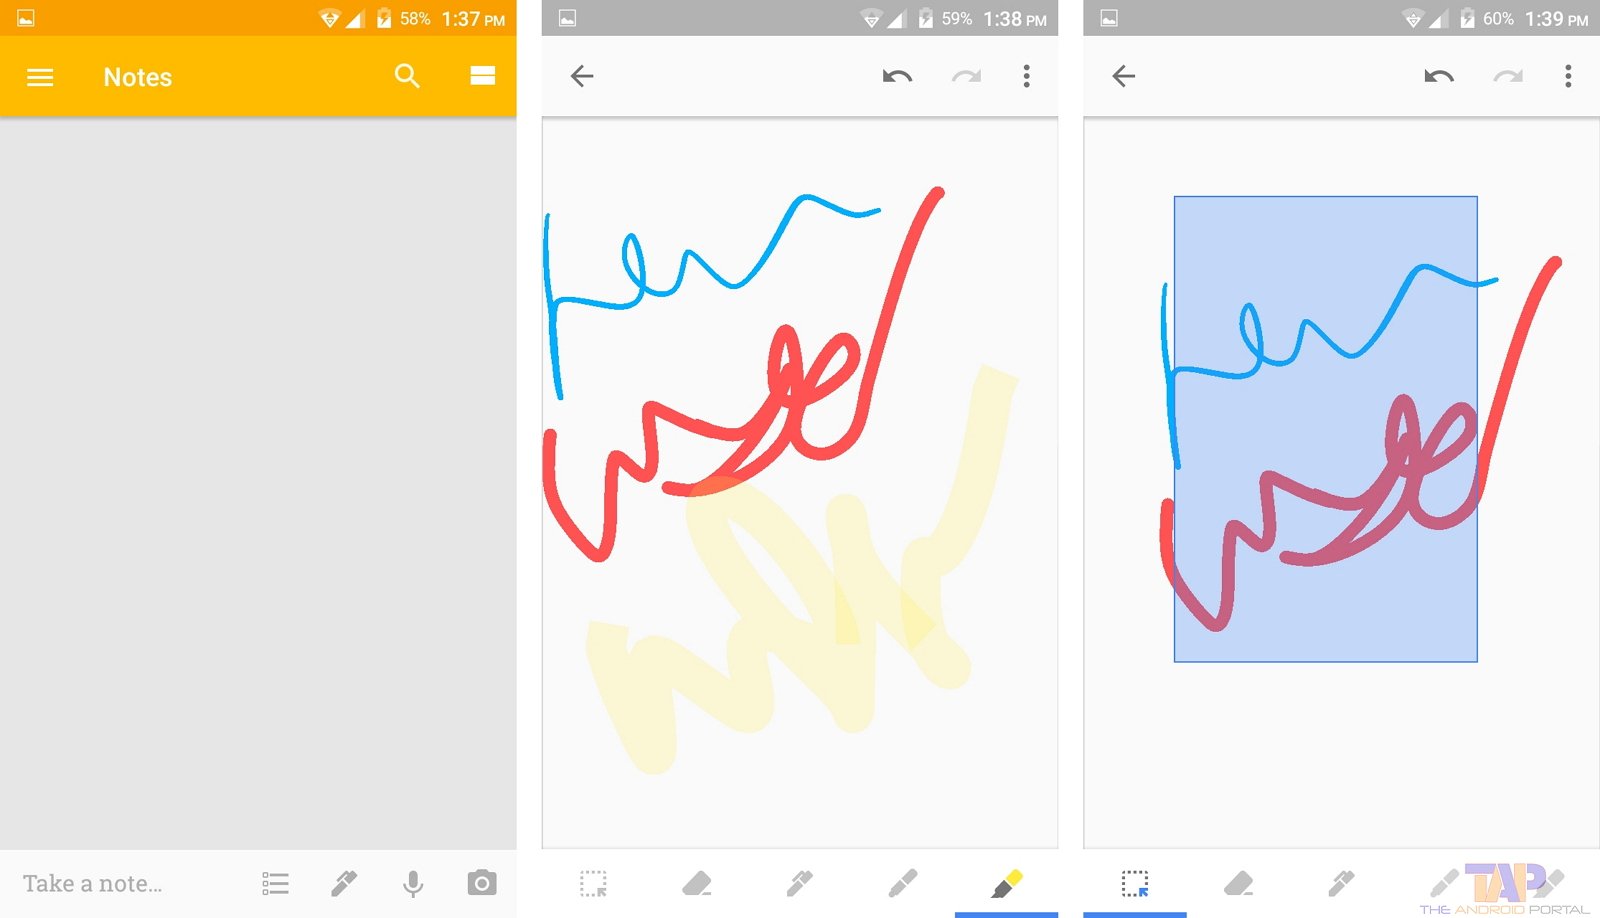
- First, open the Google Keep App on your device
- Now tap on the “Pen icon” at the bottom
- You can also select between Pen, Marker, and highlight mode
- Now you can start drawing on the screen, tap on the “Undo icon” to go back to the top right
- To delete your drawing, you can use the “Eraser” button at the bottom of the screen. The Select icon allows you to select and move your drawing
- Select and move your drawing, tap on the “Select icon” at the bottom left side of the screen
How to Set Reminders
To overcome forgetting important tasks, Google Keep lets you take notes. But, what if even after taking notes, you forget to complete the task? It might happen that sometimes we are surrounded by loads of work and responsibility.
So, even in the busyness, one thing will remind you to complete the tasks and that is Reminders. For each note, Google Keep lets you set the Reminder.
- Choose the note that contains important tasks.
- Open it.

- Look at the top of the screen. There are some options with the sign. These signs are of Pin, Reminder, and Archive.
- Here, tap on the Reminder option to get reminded about completing tasks from time to time.
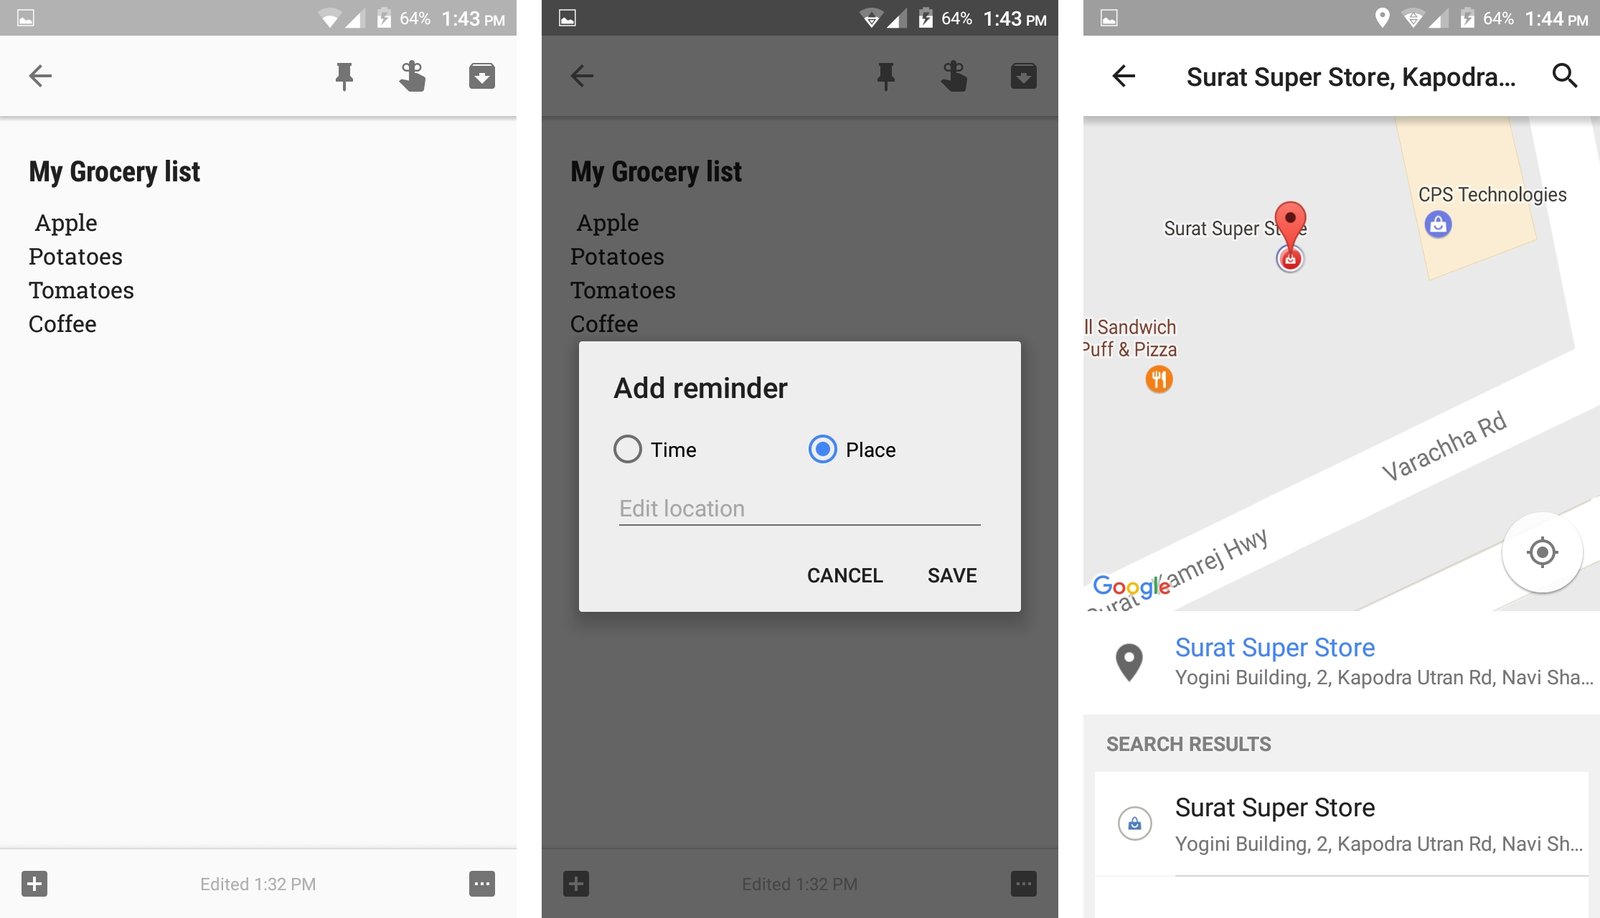
- As a reminder, you can set it in two steps, one is Time, and another is Place.
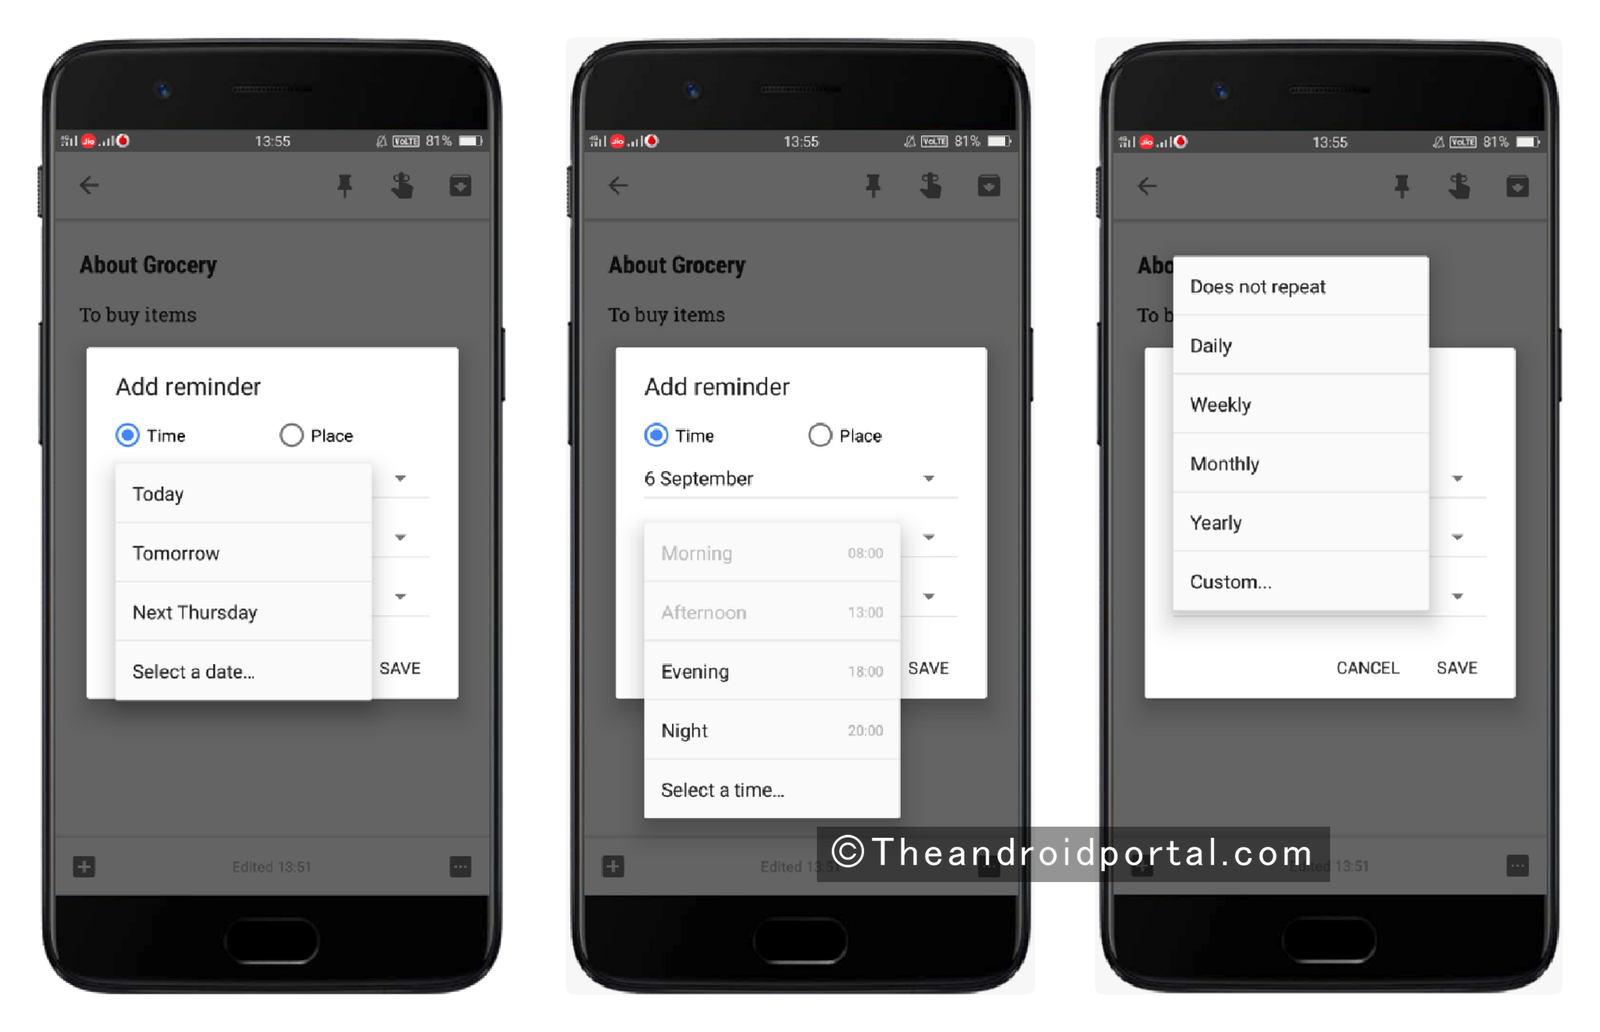
- In the meantime, you can set the date, time, and snooze. To set the date it offers Today, Tomorrow, A week after, and Select a date option. You can also have more options for the time as Morning, Afternoon, Evening, and Night, and Select a time. Again, for the snooze, you will be asked to choose from Does not repeat, Daily, Weekly, Monthly, Yearly, and Custom.
- The place option allows you to add the location in the notes.
Add location in your Notes
You can also add Location to your notes in the Google Keep app. Adding location to your note in Google Keep is quite simple and easy. To add a location follow these steps
- Open Google keep the app from your Android smartphone
- Now select the note that you want to add the location
- Here, you have to tap on the “Remind me” icon at the top of the screen
- Choose “Place” and type “Name” of the location that you want to add to your note

- Now find and select the location, then tap on the name of the location and tap on the “Save” button to save your location in the note
Add Audio Notes in Google Keep
You can also add audio notes in the Google Keep app with your voice. To add audio notes in the Keep app, follow these simple steps
- Launch Google Keep on your Android smartphone
- To add audio, tap on the “Microphone” icon at the bottom of the screen

- Now start speaking what you want to record and add in note
- Once you’re done speaking, you will see a text that you have recorded in your audio note.
- You can also listen to your recording by pressing the “Play” button
Create Notes & List Using Voice commands
You can create notes and lists by your voice on your Android smartphone in Google Keep. You can also add, change, and delete list items. To use this feature, make sure that “OK Google” is turned On. To Create notes and lists by voice, Follow these simple steps.

- First, unlock your Android smartphone
- Now Say “OK Google” or you can also tap on the Microphone icon on the Google Search bar
- Say “Take a note” when a mic appears on the screen
- Choose the Google Keep app, if prompted to select the app
- Now, the keep app will say “What’s the note?” you can do what you want to add to your Note. You can say something like this, “Go Mall Shopping today and remember to get clothes.”
- You will see your spoken note as text on the screen when you stop talking
- After this, your note will be saved automatically in Google keep
You can also view and edit your notes in a keep. You’ve done it.
Adding a Collaborator
Google Keep lets you add the collaborator when you don’t want to share it universally. If you want to allow access to the notes for only two or three people, then this feature will be very useful. For that, you just need to add the email ID of that person.
Here is how to do so.
- Open Google Keep on your device.
- Then, select the note in which you wish to add the collaborator.
- Now, you can see two signs + and … at each corner at the bottom of the note.
- Here, tap on the … which is on the right side.
- It offers options like Delete, Makes a Copy, Sends, Collaborator, and Labels.
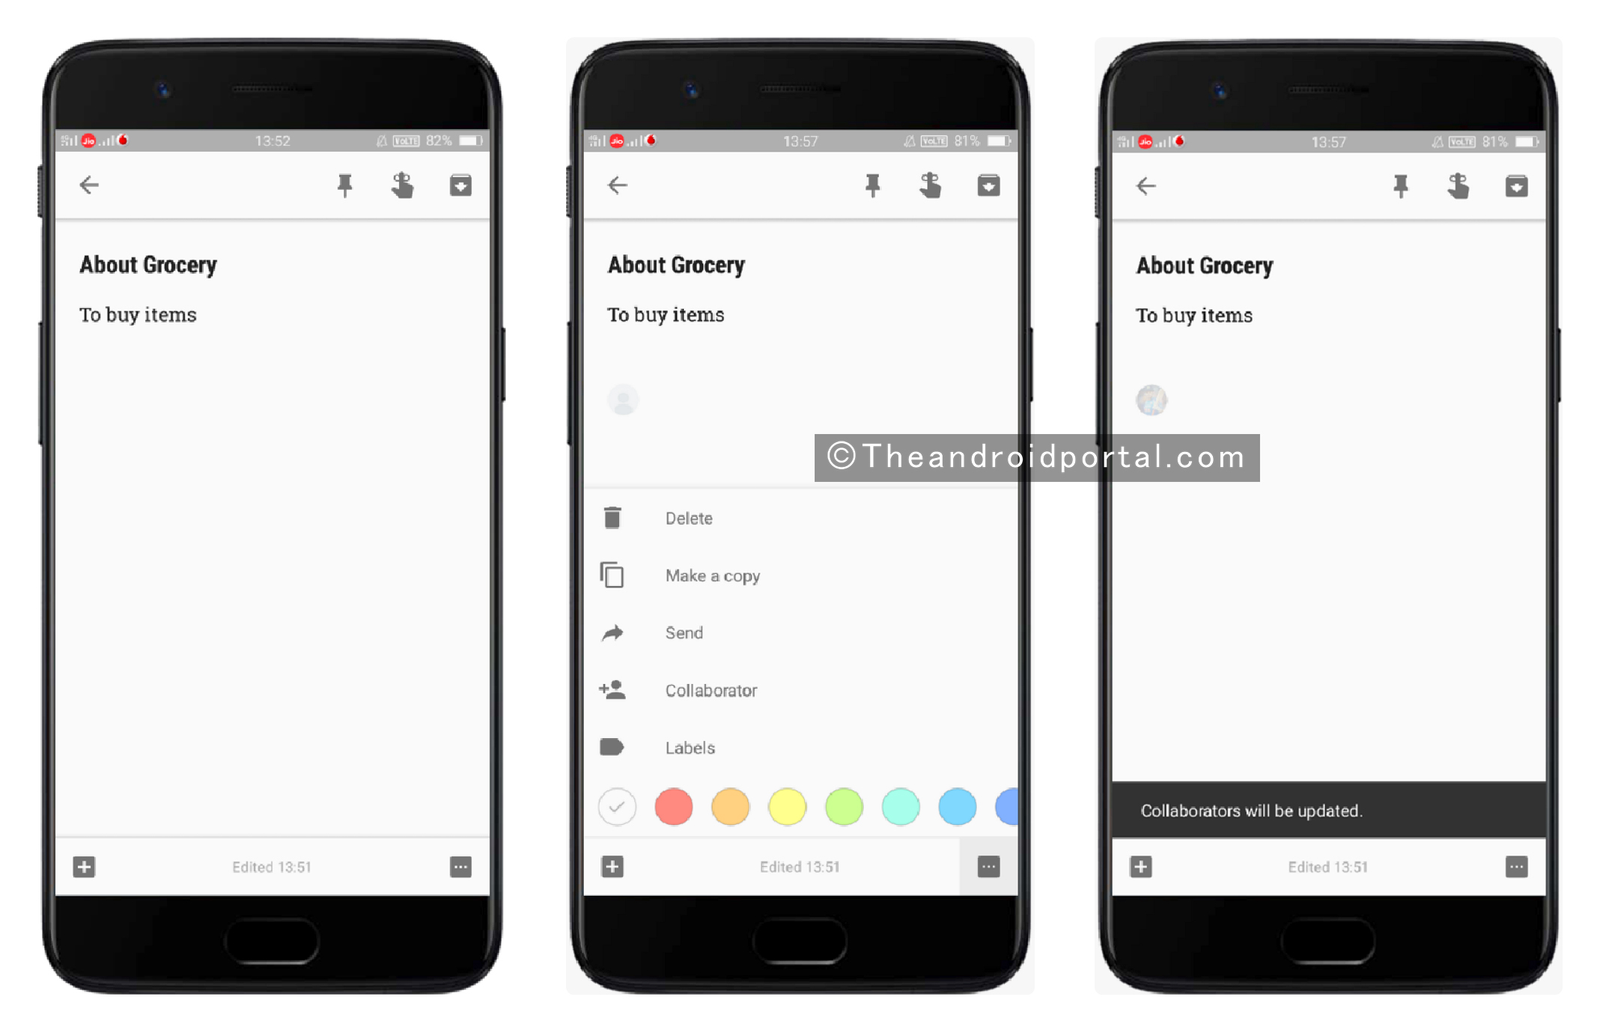
- Tap on the third option Collaborator to add the note.
- On the next screen, you will be asked to add the person or email id which you want to add as a collaborator.
- As you add the email id, you can see the collaborator on the notes.
Along with adding the collaborator, its removal process is also easy. Tap on the profile of the collaborator that you can see in the note. Then, tap on the x sign on the next page and the collaborator will be removed.
Share a Note
If you have created a note for your business or profession, sometimes you need to share it with others. Google Keep provides various sharing options. Also of that, you can share the note in terms of the document.
First of all, you need to copy the note to Google Docs. You can find this process below.
Now, to share the notes from Google Keep,
- Choose the Note that needs to be shared.
- At the bottom, you can see two more signs + and … at each corner.
- Here, tap on the … which is on the right side.
- It brings some options including Delete, Makes a Copy, Send, Collaborator, and Labels.
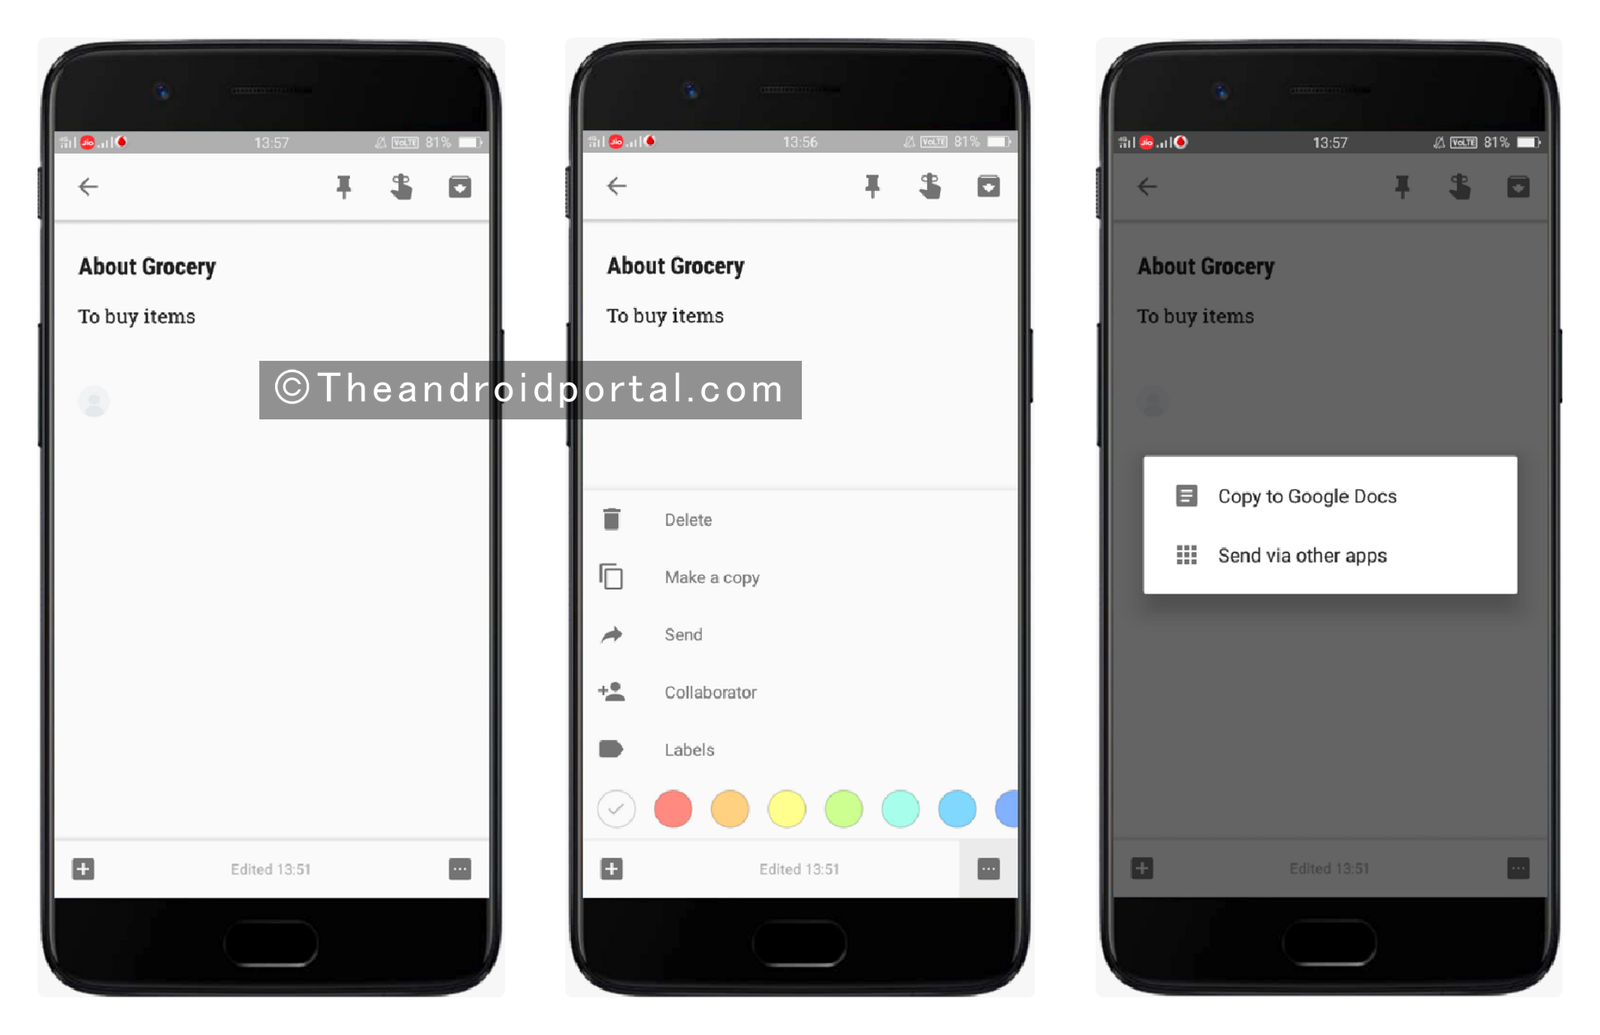
- Tap on Send option. It again offers two more options Copy To Google Docs and Sends Via Other Apps.
- Here, go with the second option Send Via Other Apps.
- You can have all the possible sharing options. Now, choose the relevant platform and share it.
Archiving a Note
Archiving the content on any of the apps will also work as a secret. We all know what happens whenever we archive something. Once we archive the content, we can not find it under the normal screen. To access it, we need to find it under the Archived section.
So, the same Archive option you can also find here in Google Keep. It will hide the note from the main screen where all the notes are placed. To archive the note in Google Keep, there are two ways. Which, the first will let you archive multiple notes, while the remaining one will only archive individually.
To archive multiple notes at a time,
- Open the Google Keep App on your Android mobile.
- Next, you can see all the notes that you have saved in the app.
- Now, decide the notes that you want to archive.
- After that, select all those notes.
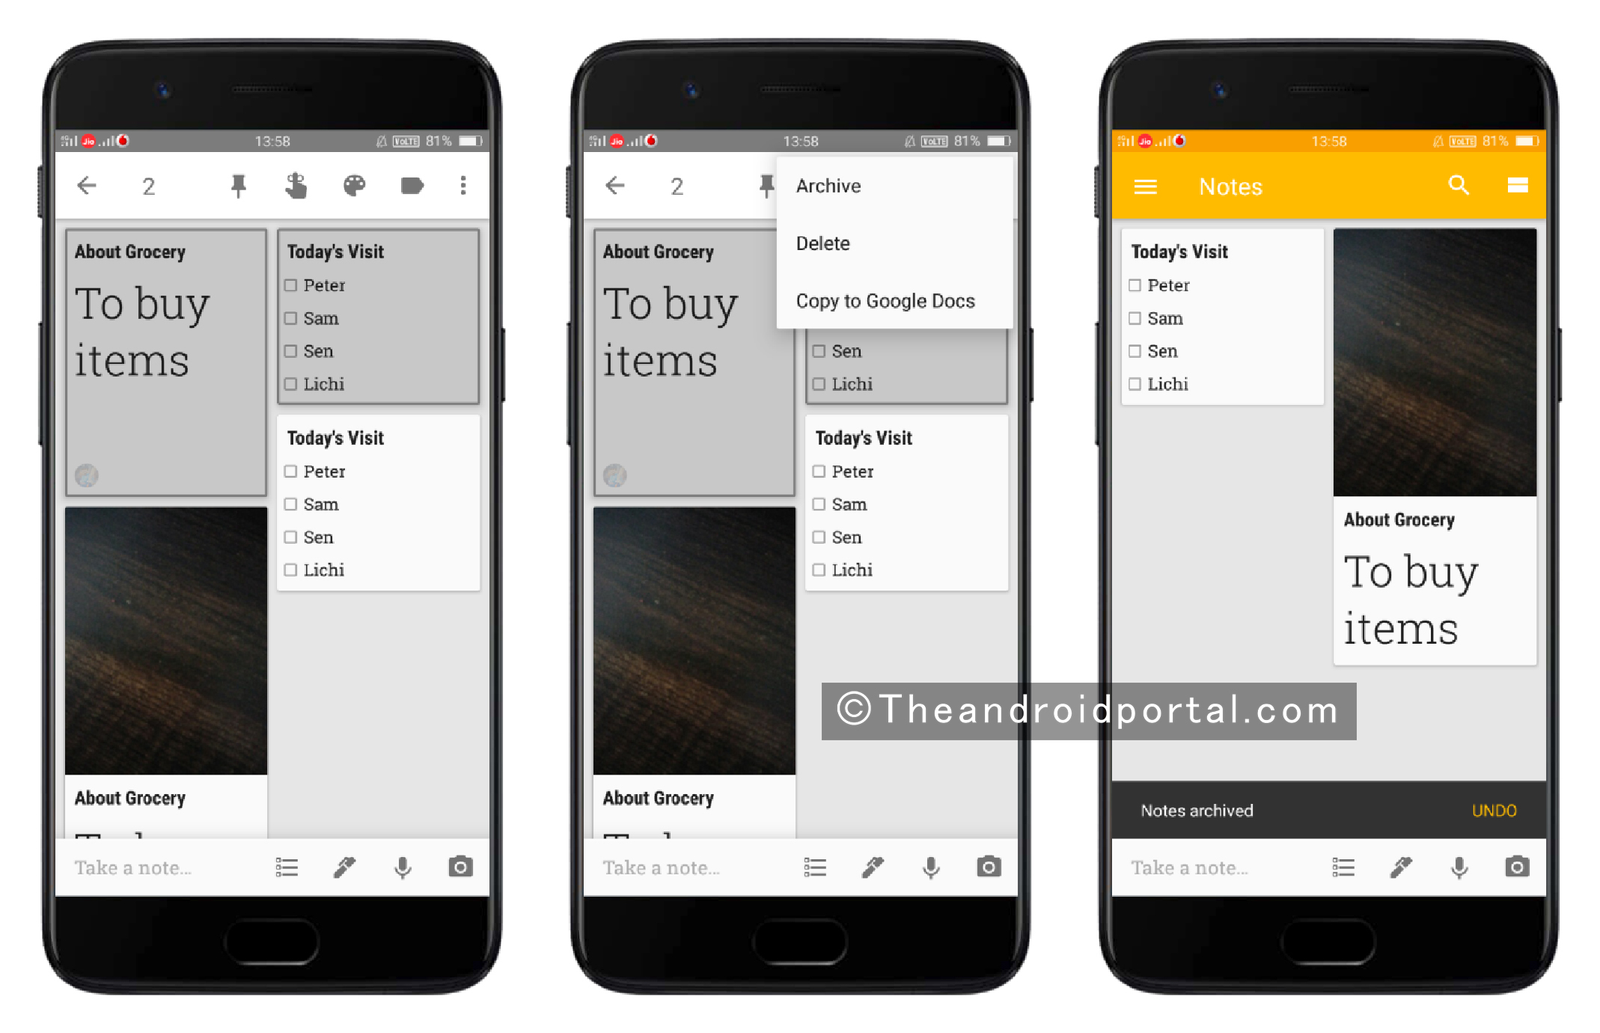
- Then, tap on the three dots which are located at the top right corner.
- It brings three options for you Archive, Deletes, and Copy to Google Docs.
- Here, choose the first option to archive the notes.
To archive the individual notes,
- Open the note that you want to archive from the list.
- Now, at the top of the screen, there are some options with its typical sign.
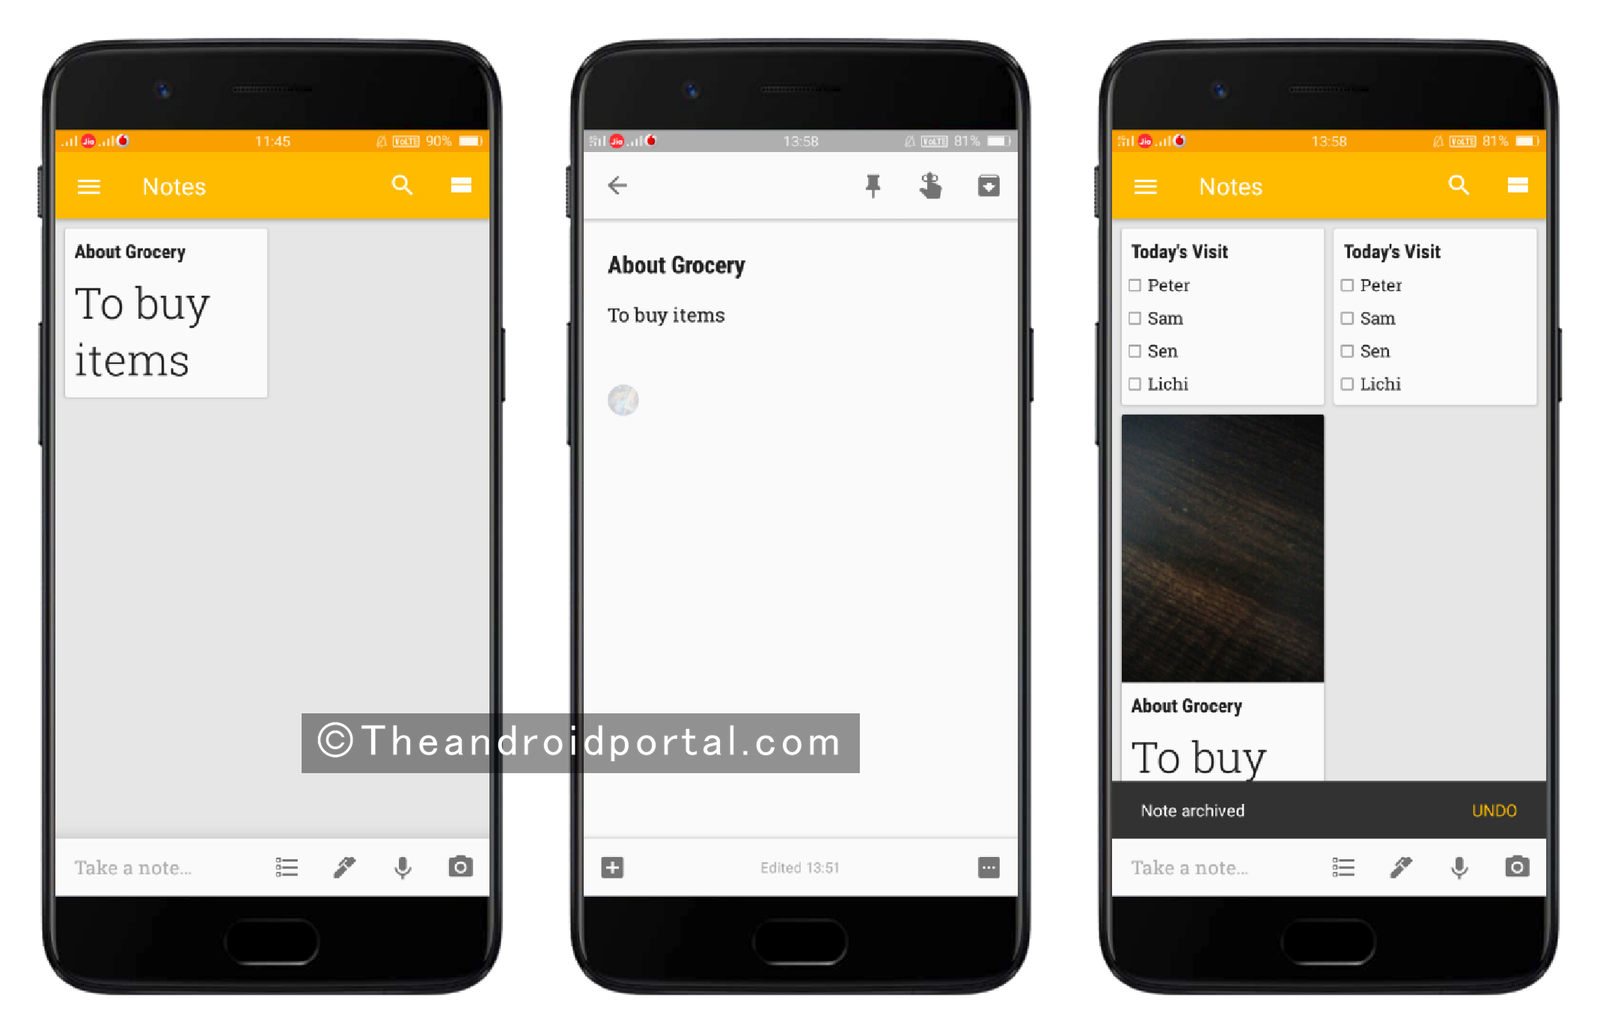
- These options are Pin, Reminder, and Archive.
- Tap on the Archive sign which is at the top right corner again.
Google Keep has made archiving the notes easy in the above-listed ways.
Export notes on Google Docs
Alongside taking notes, Google Keep has so many more features. We have already discussed the features above. One of the interesting features is that you can copy the note directly to Google Docs. This feature is recommended to use when you need to share the note with any file format like PDF, Excel, and more.
Like archiving the files, it is also easy to copy the notes to Google Docs. You can copy the multiple and individual notes directly to Google Docs. Here is how you can do it.
To copy notes to Google Docs,
- Open the Google Keep App.
- The next screen will show you all the notes that you have created and saved.
- Now, pick the notes that you want to copy to Google Docs.
- After that, select all the notes.
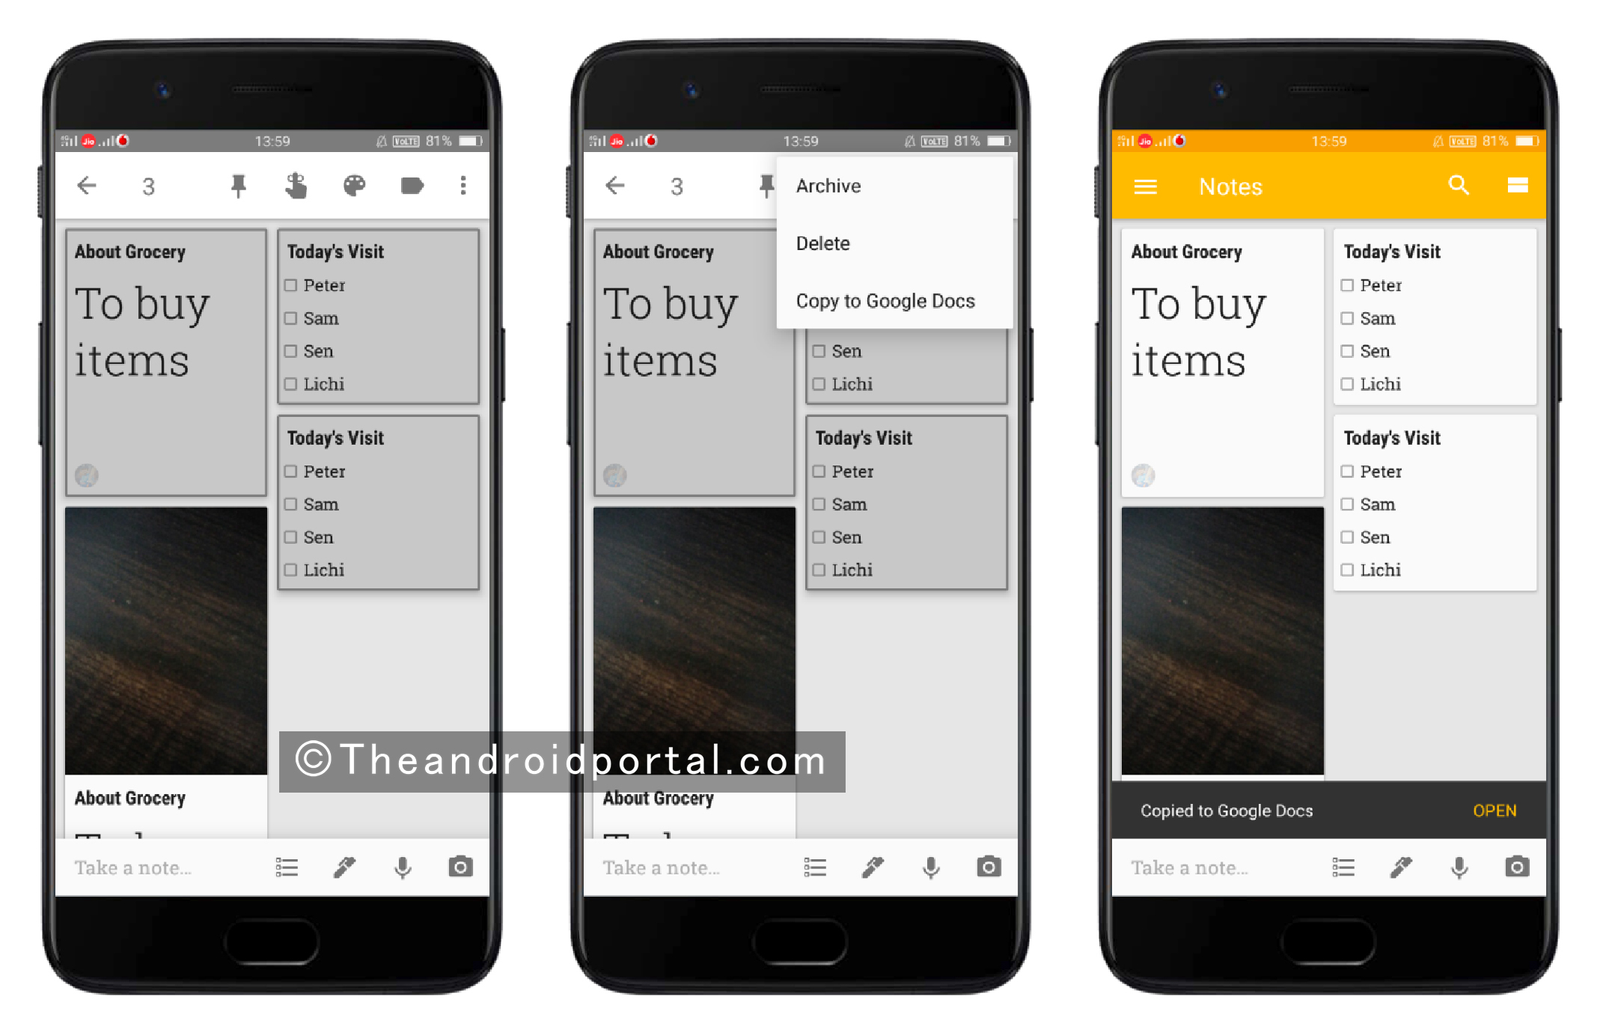
- Then, you should see three dots in the top right corner. Tap on it.
- It brings some options for you which includes the Copy to Google Docs option.
- Here, go with the Copy to Google Docs option to copy the notes.
- As soon as the copying is complete, you can get a message as Copied to Google Docs.
You can also check that note in Google Docs. From there, you can share the note in different formats like Word, PDF, Open Document, Plain Text, Rich Text Format, Web Page, and EPUB formats.
In terms of the last words, we added almost all the important features and functions.
What’s your thought on it?
If you think we have missed something important about Google Keep in this post, do let us know in the comments below.
