Have you ever considered deleting your Instagram account? Whether it’s for privacy concerns, reducing screen time, or just taking a break from the world of social media, deleting your Instagram account can offer a range of benefits.
You can accomplish this task from your phone or computer, and once it’s done, all your account data, information, and content will be automatically removed from Instagram’s servers. However, it’s worth noting that if you decide to use Instagram again in the future, you can create a new account using the same email address and phone number, but all your previous data will be lost.
In this guide, we’ll walk you through the steps to delete your Instagram account, both temporarily and permanently, depending on your preference.
Delete Your Instagram Account in a Few Easy Steps (with Screenshots)
You can either delete your Instagram account temporarily or permanently, depending on your preference. We will discuss both steps in this article, read further to know more:
Permanently Disable Instagram Account
We all know Instagram is a popular social image-sharing platform used by many users nowadays. But sometimes, we want to get rid of our social presence, and at that time, we think about deleting Instagram.
Check out the steps below to delete your Instagram from your smartphone.
Step 1: Tap on your “Instagram App” to launch Instagram.
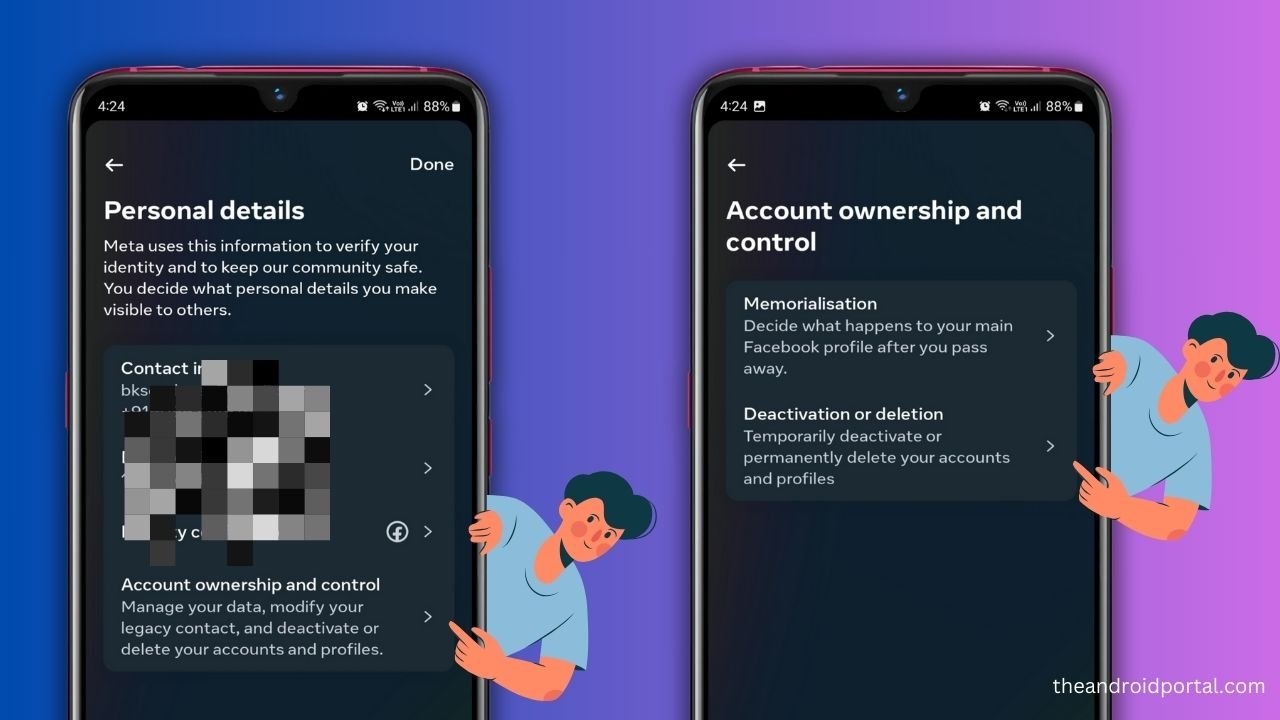
Step 2: Now, Click on “Edit Profile” and choose “Personal Information settings“. Click on it

Step 3: Now you will see the Personal details page, where we have to choose the “Account ownership and control” option.
Step 4: You will see the “Memorialisation” and “Deactivation or deletion” options on this page. (Since we want to delete the Insta account, we will select the “Deactivation or deletion” option)
Step 5: Now, you will see a list of profiles associated with your Facebook and Instagram accounts. Since we want to delete the Insta account, we will select our Instagram profile from the list as shown in the image below.

Step 6: The next step will be “Deactivating or deleting your account” as shown in the image below.
Now We have two options to delete our account.

Deactivate Account Temporary
If you want to deactivate your Instagram account temporarily, you can select the first option that says deactivate account temporarily.
Deleting Account Permanently
If you want to get rid of your Instagram account permanently, choose to delete the account option.
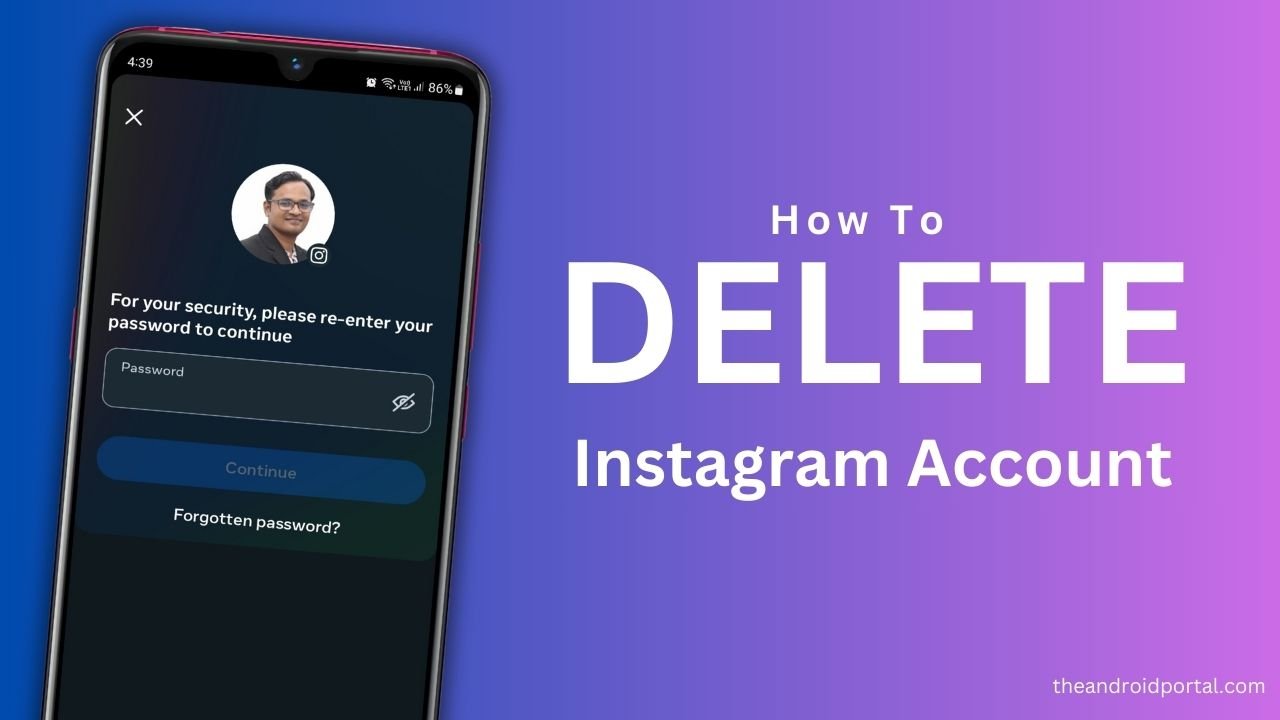
Step 7: In the next step, you will be asked to enter your Instagram password.

Step 8: Now enter your Instagram “passcode” and tap on the “Continue” button to complete this action.
Step 9: Here, you have to select the “reason for deleting your account” using Drop drop-down menu. After choosing the reason, Type your passcode again.
Step 10: After typing the passcode, you must tap “Permanently delete my account/Deactivate account” (Whichever option you have selected in step 6) and then tap on the OK button to complete this action. After this, your account will be permanently removed from the Instagram server.
Important Note 👉Users have 30 days to change their mind and reactivate their account. After 30 days, the account will be permanently deleted and all data will be lost.
Is there any deactivation link?
Yes, there is. You can check out this link for deleting your Instagram account permanently.

How to back up your Instagram data before deleting your account
Backing up your Instagram data before deleting your account is a prudent step, especially if you’re considering reactivating your account in the future.
Instagram allows you to download a copy of your account data, which includes your photos, videos, messages, and other information.
Here’s how to back up your Instagram data:
- Open the Instagram app and go to your profile by tapping on your profile picture in the bottom right corner.
- Tap on the “three horizontal lines (menu)” in the top right corner > Select “Your Activity.“
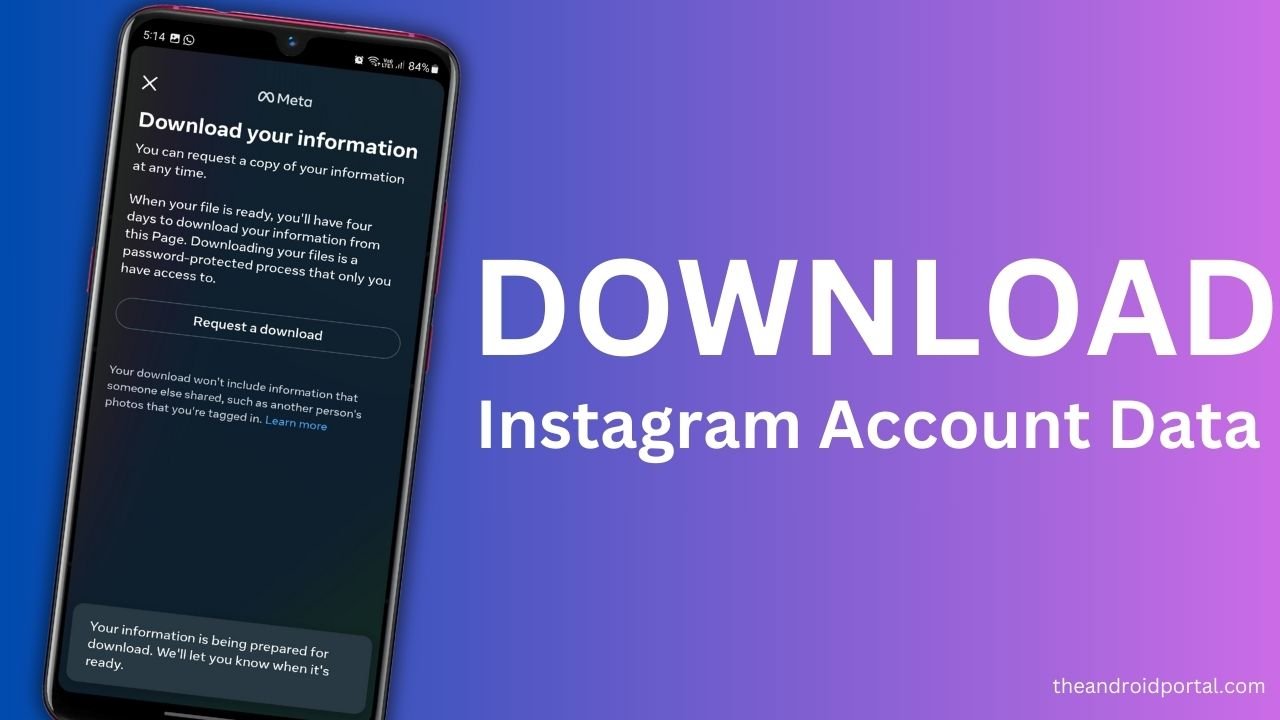
- Scroll down and tap on the “Download Your Information.” option at the bottom.

- Now in the next step, you will see a list of your profiles associated with your account. Select the profile for which you want to download data. (Users will have an option to download data in various formats like HTML, JSON, and XML)
- Instagram will now prepare a copy of your data. This process may take some time, depending on how much content you’ve posted on Instagram.
- Once the data is ready, Instagram will send you an email with a link to download your data. Click on the link in the email.
- You’ll be directed to a webpage where you can download your Instagram data as a zip file. Tap “Download Data” to save it to your device.
Troubleshooting Common Problems
Deleting your Instagram account should be a straightforward process, but occasionally, you might encounter some issues. Here are solutions to common problems users face:
- Difficulty Logging In: If you’re having trouble logging in to your Instagram account to initiate the deletion process, ensure you’re using the correct credentials. Double-check your username and password. If you’ve forgotten your password, you can use the “Forgot password” feature to reset it. Make sure your internet connection is stable, and try logging in from a different device or browser if the issue persists.
- Missing Delete Account Option: Some users report not seeing the “Delete Your Account” option in the Instagram app or web version. To resolve this, ensure you’re following the correct steps:
- Open Instagram and go to your profile.
- Tap on the three horizontal lines (menu) in the top right corner.
- Select “Settings,” then tap on “Help.”
- Choose “Help Center” and type “Delete Account.“
- Follow the provided link that guides you to the deletion page.
- Account Not Deactivated: If you’ve chosen to temporarily disable your account but it’s still visible, ensure you’ve followed the steps correctly:
- Open Instagram on a web browser (not the mobile app).
- Go to your profile by clicking on your profile picture.
- Click on “Edit Profile.”
- Scroll down and click “Temporarily disable my account” on the bottom right.
- Follow the steps and provide a reason.
- Enter your password and click “Temporarily Disable Account.“
- Account Reactivation: Sometimes, users unintentionally reactivate their deleted accounts. To prevent this, make sure you don’t log in to your Instagram account after initiating the deletion process. Avoid using any Instagram-related apps or services.
- Error Messages: If you encounter any error messages during the deletion process, take note of the message and try searching for it in Instagram’s Help Center. You may find specific solutions or instructions to resolve the issue.
- Waiting Period: After requesting to delete your Instagram account, there’s usually a brief waiting period before the deletion is finalized. During this time, your account is temporarily deactivated. If you attempt to log in, your account reactivation might be triggered, so it’s best to avoid logging in during this period.
If you’ve exhausted all troubleshooting options and still can’t delete your Instagram account, consider reaching out to Instagram’s support team for personalized assistance.
Remember that deleting your Instagram account is a significant step, so be sure it’s what you want to do before proceeding. Backup any important data or content you want to keep, as once the account is deleted, it cannot be recovered.
More Account Delete Guide:
Do let us know in the comments if you want us to create any tutorial or guide for you, and we will publish it on our theandroidportal blog.


