Google Pay, which was previously called Google Tez, has been rebranded as Google Pay in India. We have discussed recharging prepaid mobile phones using Google Pay in our previous article. But to recharge or perform any transaction, you must have your bank account linked with your Google Pay account. Then only, you can perform the specific transaction. So if you haven’t already configured your bank account with your Google Pay account and looking for any guidance to do so, you are at the right place.
Google Pay – Adding & Removing Bank information
In this article, we will discuss how you can set up your Bank account and also delete your bank account from the Google Pay Android app.
Setting up a Bank Account with Google Pay
First of all, you should open your Google Pay Android app on your device. At the time of first starts, it will automatically detect and configure your bank with Google Pay. But if you want to configure more bank accounts you own, you can use these steps.
You can also follow these steps if you have deleted your bank account details from Google Pay and want to set it up again. To set up your bank account with your Google Pay account, tap on the settings icon located at the top.

Now find out the “Bank Account” option and tap on it. You will be able to find it just below your mobile number. You will be able to see the “+ADD BANK ACCOUNT” option from there.
When you select add bank account option, you will see a list of Banks on your next screen.
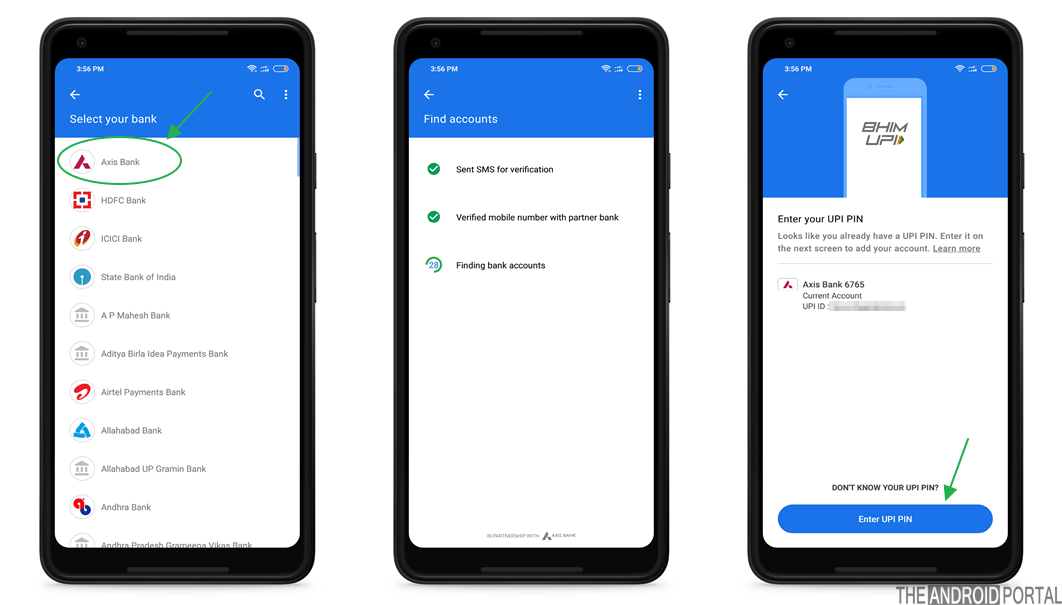
You will have to select the bank from the list, where your account there, and make sure you have registered your mobile number with that bank. Also, your SIM card with that registered number is inserted into your mobile. As it will verify your SIM card and send a message to your bank from your SIM to verify your account ownership.
So if you have inserted your SIM card into another mobile and set up UPI on your other mobile, it will not get verified successfully.
We assume that you have your registered number SIM card inserted on your device and setting up Google Pay with it. So it will send an SMS from your device to the Bank for final verification and once verified, it will ask you to enter your UPI PIN on the next screen.
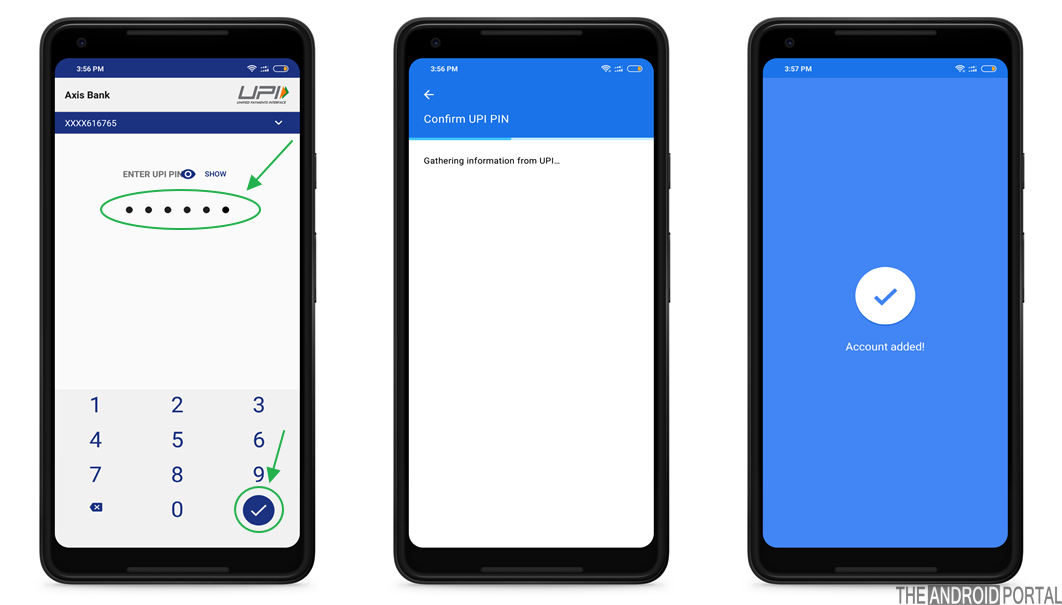
Once you add your UPI PIN, it will connect your bank account with your Google Pay account, and on the next screen, you will see the account added option.
Now, if you have set up and connected your multiple bank accounts and want to remove some of them, you can use the below method to delete your bank information and UPI account associated with your Google Pay account.
See also: How to Setup Bank account in WhatsApp
Deleting a Bank Account from Google Pay
To delete your configured Bank account, you will need to open your Google Pay Android app and go to Settings by tapping on the top right 3 dotted option.
Once you select the setting option, you will see your profile details there. You will see the “Bank account” option just below your mobile number.
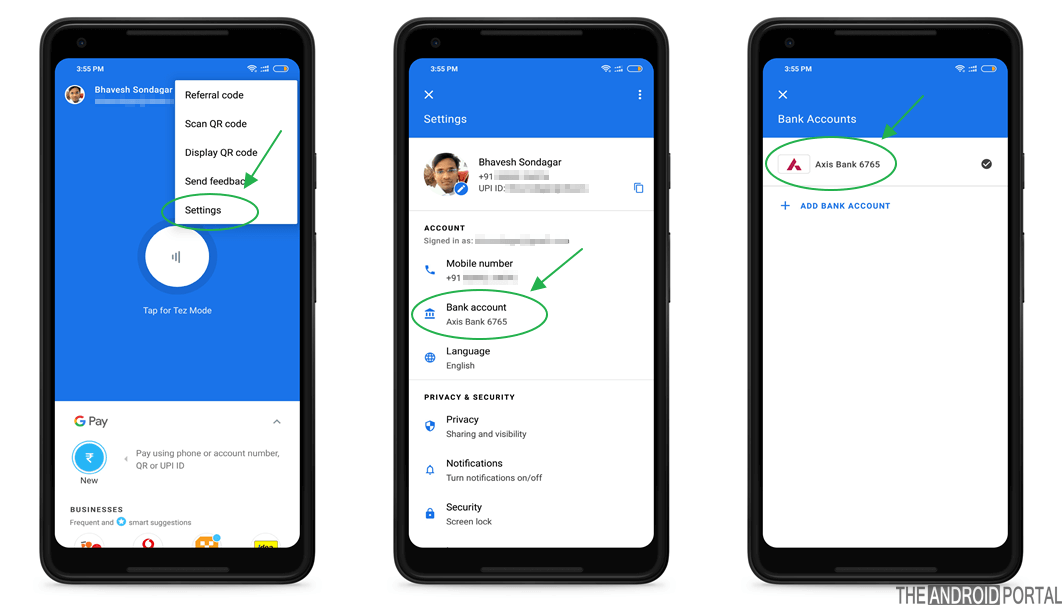
Select the bank account option to see the bank that you have set up with your Google Pay account. Now Tap on that bank information to see the further option.
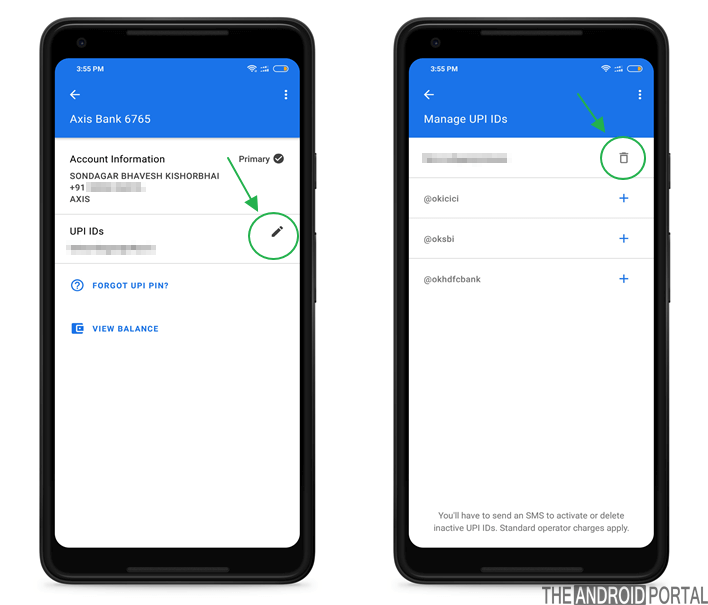
Here you will see your Account information, including your name, mobile number, the name of the bank, your UPI ID, etc. We have to tap on the pen icon that we see just beside the UPI ID option.
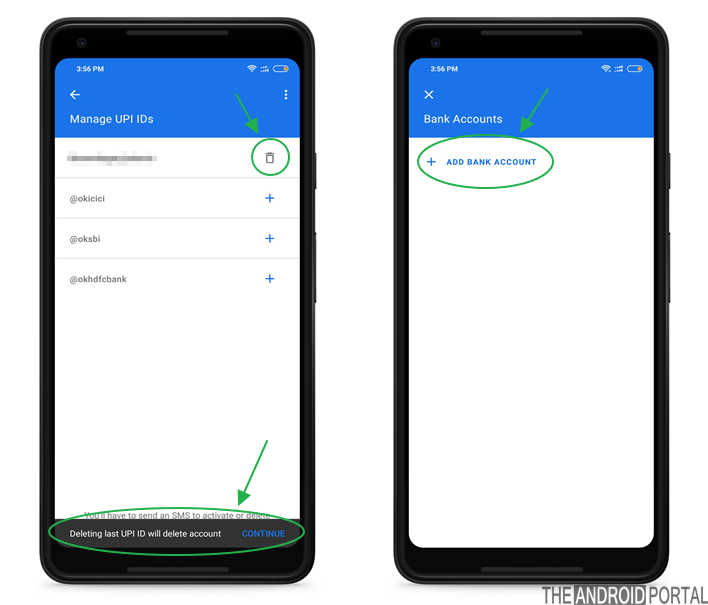
Here you will see trash like an icon, you will need to tap on that trash icon to remove your account associated with your Google Pay Account.
You will be asked, “Deleting the last UPI ID will delete the account“. Likewise, if you have multiple bank accounts associated with your Google Pay account and you want to delete some of them, you can use this same process.
If you still need help setting up your bank account with Google Pay, you may check out this video tutorial created by us to help you. Also, subscribe to this channel to get more videos like this.
We hope this article and video about adding & removing a bank account with Google Pay has helped you. If you guys have any questions or problems following those steps, feel free to let us know in the comments section below.


