Running out of internal storage? Want to move pictures to an SD card? If yes, then you landed here on the right page. Today in our article, we are going to discuss how to move pictures to SD cards.
There are lots of ways like using the third-party app, or by using a computer, you can quickly transfer all your data to the SD card. We recommend you all the ways in our article so, read our article further to get more details on that matter.
Not all phones come with unlimited storage, but at least many android phones offer the option to expand that storage with micro SD cards. Not every phone supports micro SD card, like Huawei, but the phone that supports provides the extra space for your apps, music and photos.
You are not allowed to move all your apps to the micro SD card, but you can surely move other data, files, pictures, and videos quickly. So, if you are fond of taking pictures or listening to music, then you must install a micro SD card on your device. Without too much ado, let’s proceed towards the main content.
How to Move Pictures to SD Card?

We recommend three possible ways to move your pictures to a micro SD card in just a minute. So, let’s take a look at the methods below:
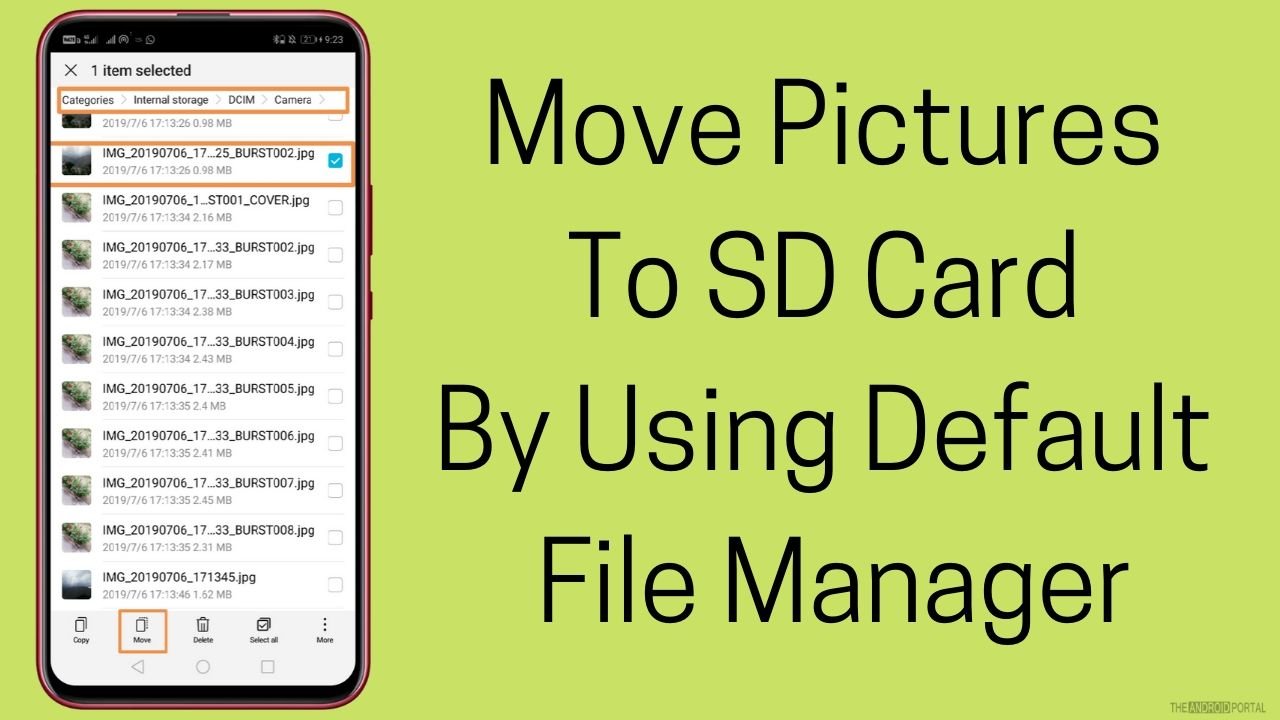
Move Pictures to SD Card By Using Default File Manager

Most Android phones come with an inbuilt file manager app, but some phones do not offer this option. So, if your phone does not have a file manager app install the third-party app from the Play Store.
Here is the step guide:
- Open the File Manager app from the home screen apps.
- Then click on “Internal Storage”.
- Open the “DCIM” folder to move the images in your SD card.
- In the “DCIM” folder, long press the “Camera Folder”.
- Then tap on the three-dot menu icon in the top right corner of the screen.
- From the list click on “Move”
- Tap “SD card”
- Tap on the “DCIM” folder in the SD card or the other folder where you want to move your pictures.
- Wait until the process is completed.
- The whole process can take only 2-3 minutes.
So, those are the quick steps to move your pictures to SD Card and free up space for new captures.
Move Pictures To SD Card Using ES File Explorer

- Download and install the “ES File Explorer” app on your Android.
- Open the app from the home screen apps.
- Tap on “Images Folder”
- In the image folder, you have seen the other folders. Long press the folder that you want to move.
- Tap on “Move” to the lower right of the screen.
- Then select the folder in your “SD card” where you want to move your pictures.
- Wait until the process is completed.
Summary
So those are the quick ways to move your pictures to an SD card. Both methods are secure and help you free up your internal phone storage. You can try any of the above methods which are comfortable for you.
Thanks for reading this post. We hope you enjoy reading this article. For more updates do follow us and stay tuned with us at The Android Portal.


