Did you hear about the latest Android update that Google has just launched? Well, you know it’s impressive with all the cool features. What?… Don’t you know how to download and install it? Don’t worry; here we will help you OTA UPDATE ON ANDROID.
Whether your Android device needs to run an advanced application or wants to use the latest technologies and features, this article will help you in carrying out all the necessary technicalities to install OTA updates on Android.
However, before we directly jump into the topic, it requires us to follow some essential steps. So, let’s start with the basics first and get familiar with what an OTA update on Android is.
WHAT IS OTA AND HOW IT WORKS?
An over-the-air (OTA) is an advanced service for Android devices to get the latest Android version without any hassle. Furthermore, Android has a couple of changes applied to the newest version, and due to this, most of the users failed to get it. However, OTA can deliver the latest version of Android following a straightforward process.
HOW TO DOWNLOAD OTA UPDATE On Android?
You can download the OTA update on your Android device through official Google services. So, start by following the below steps carefully.
STEP 1: Open your web browser type download OTA with your device model name, and press enter. Also, you can visit the site directly by clicking here.

STEP 2: Here you need to read all the Terms and conditions and instructions carefully.
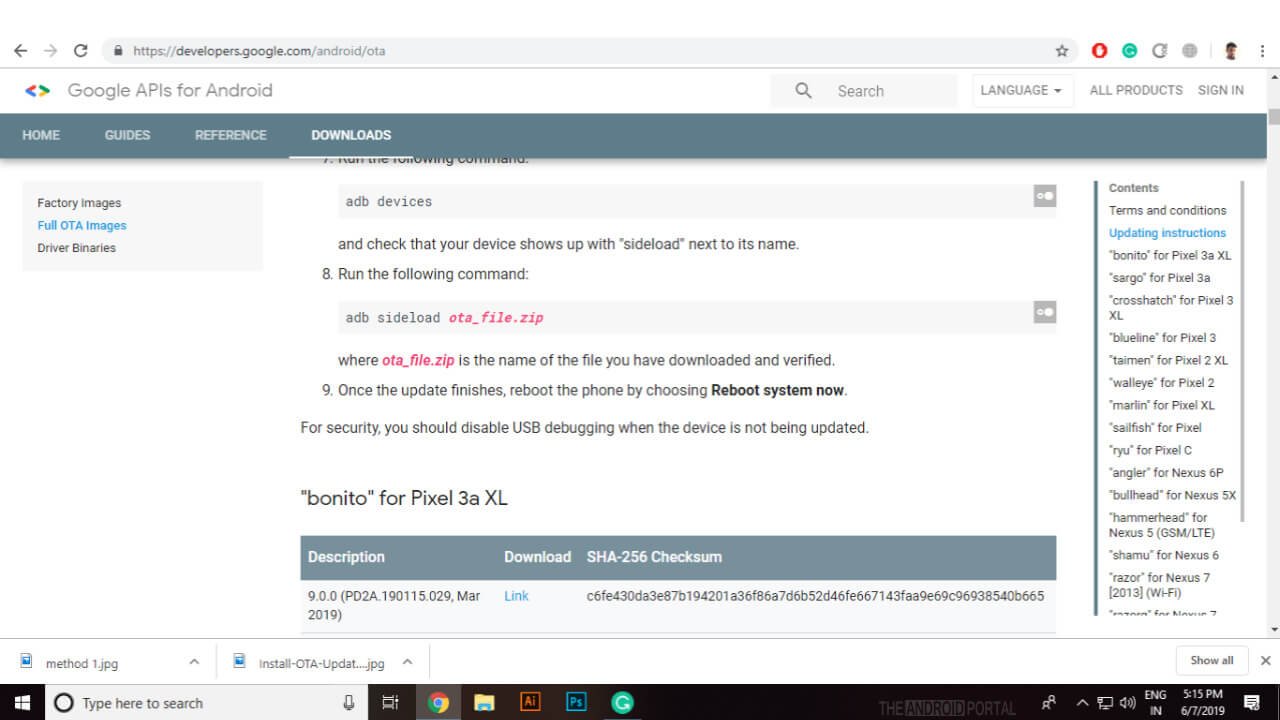
STEP 3: Now select the OTA update you want to install and download it.
So, that’s it and you are done with the downloading part now. Now you need to proceed further to install the OTA update on Android.
HOW TO INSTALL OTA UPDATE ON ANDROID?
The installation of the OTA update on Android traditionally includes two methods. So, you can try either for a successful installation.
Update Through Recovery (For Rooted Phones)
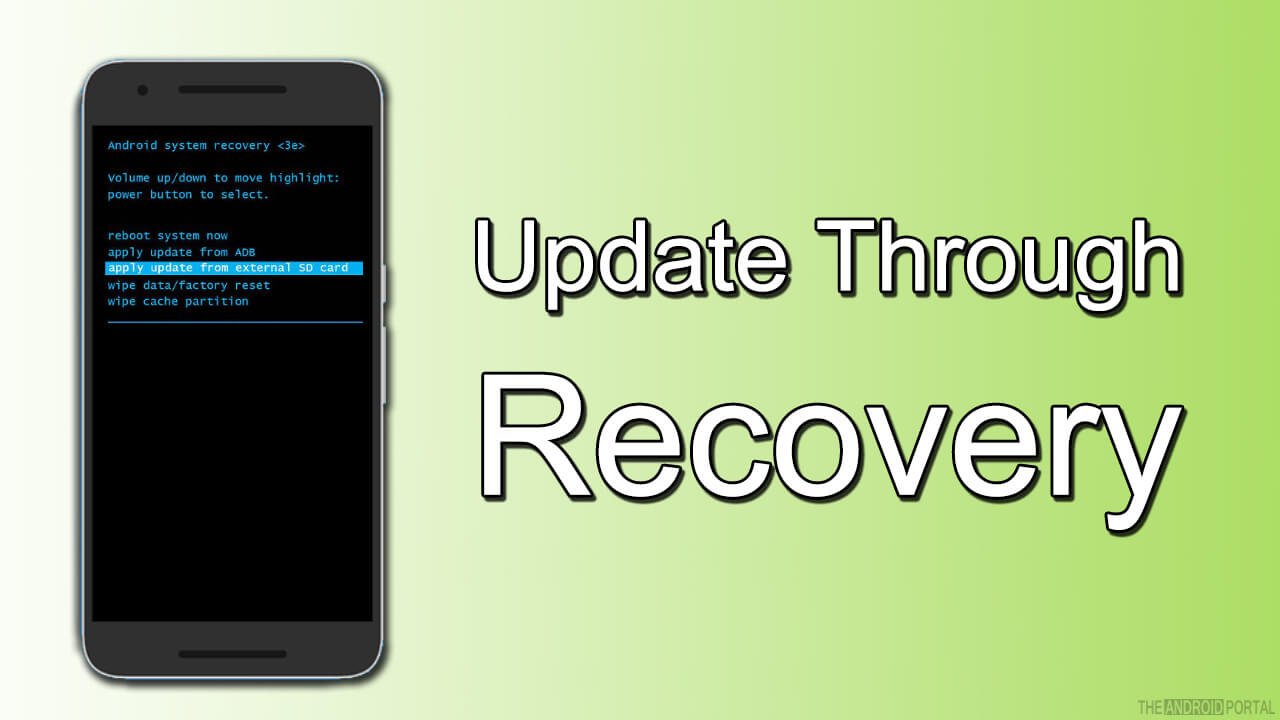
If you have a rooted Android smartphone, you can apply the latest OTA update on your Android through Recovery. Also, It has been denoted as the fastest method to install OTA updates on Android.
STEP 1: If you have downloaded the OTA file on a PC, then transfer the file to your Android device. Else, proceed to the next step.
STEP 2: Move the file to the root folder in the Internal storage of your Android device.

STEP 3: Boot your device in recovery mode and use volume rockers to navigate the options from the recovery menu.
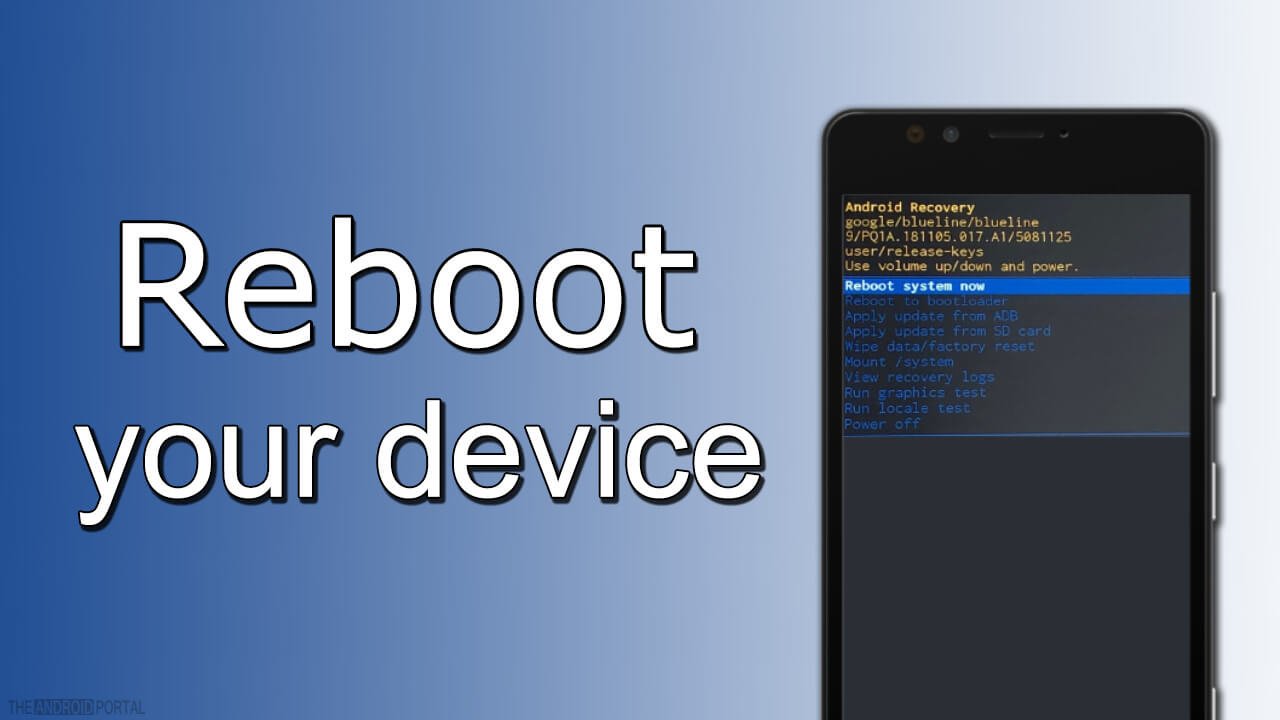
STEP 4: Now select the Apply update or Apply update from the SD card option from the menu and press the power button to confirm.
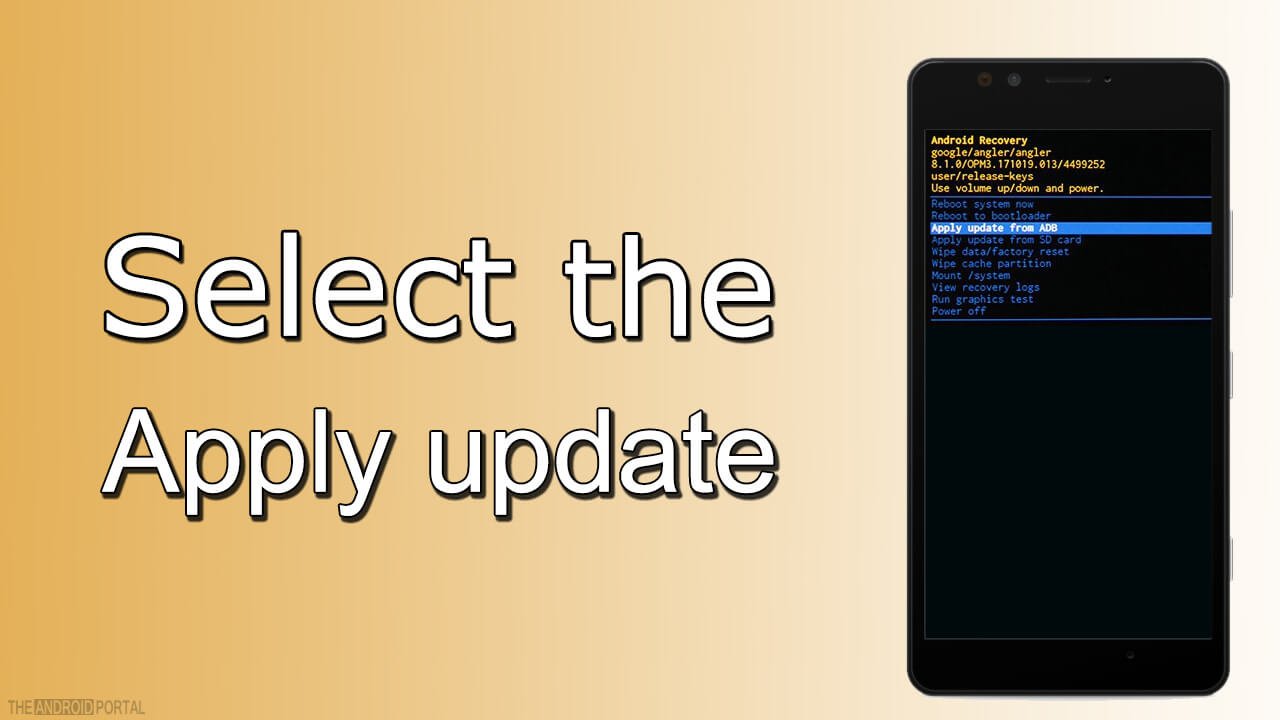
STEP 5: Select the OTA update file from the internal storage and press the power button again to confirm the process.
STEP 6: Wait until the OTA Update completes the installation process. Now select the Reboot option from the recovery option and wait for its completion.
So, now you are all set with the installation of the OTA update on your Android phone.
RECOMMENDED: Always transfer the OTA update file into the internal storage folder.
ADB Sideload Method
If the first method is not for you, you can alternatively use the ADB Sideload method to install the OTA update on Android. Therefore, to do so, follow the below steps carefully.
STEP 1: Set up ADB and Fastboot on your computer.
STEP 2: Rename the downloaded OTA update file to OTA.zip and transfer it to the platform-tools folder on your computer.
STEP 3: Now here in this step, you need to enable the USB debugging function on your Android phone
- Settings > About device or phone> Software info> Build number.
- Enable developer mode.
- Settings > Developer Options> USB debugging.
- Enable the USB debugging option from the menu.
STEP 4: Connect your Android device to your computer.
STEP 5: Open the following
Command window> OTA.zip
Run the OTA.zip file and allow the USB debugging if asked.
STEP 6: Reboot your Android device to recovery mode.
STEP 7: Apply an update from ADB and select it using the Power button from the menu.
STEP 8: Now enter the command “adb sideload ota.zip” in the command prompt on your PC to install the OTA update on Android, and the OTA update is complete.
So, that’s all, and you’ve successfully updated your Android version to the latest.
Summary
So, the above is a quick guide to installing OTA UPDATE ON ANDROID with ease. We hope this guide has explained everything clearly and now you do not have any doubts. However, if you are stuck anywhere between the steps, do comment below and we will help you.
So, that’s all for now, and thanks for reading this post here at TheAndroidPortal. Also, do follow us to stay updated with all the latest Android gossip and tutorials and to read more such posts and guides.


