
Frequently having trouble with your MX player on Android phones or tablet devices? You might have observed an MX player while playing a dual audio movie on your Android. Your MX player will show Audio format (AC3) is not supported, and the video will start playing without any sound. In this article, we will discuss how to add a custom codec to MX Player so that it can also support DTS and AC3 Audio formats.
MX player is the best media player for Android smartphones and tablets, but due to some licensing issues, the MX player does not support some audio formats like AC3, DTC, and MLP in Android devices. MX player comes with tons of features and supports approximately all video formats. When you play your favourite music videos on the MX player, suddenly, you get the error that says “Audio format (AC3) not supported”.
It means this audio file is not supported with MX codec. Only the video will play. Don’t worry about it; you can solve this error within 5 minutes. But one question will come to your mind: How to resolve the MX player codec issue on my phone? So keep reading this article to fix this error on your phone.
See also: How to Fix MX Player Not Working On Android?

We need to download AC3 audio & DTS audio codec on our phone, and things will start working. Here you can see how to add a custom MX player codec to support your phone’s AC3 and DTC audio formats.
After adding this codec, you can play all videos with AC3 and DTC audio file formats in MX player. Now follow these simple steps to solve “This Audio format (AC3) Not Supported” on your Android smartphone.
How to Configure Custom Codec on MX Player
First, you need to download a Custom codec for your MX player. But how to check what type of codec supports my Android smartphone?
To configure a custom codec on the MX player, follow these simple steps:
- Open MX Player on Android Smartphone
- Now you have to click on the “Menu” button
- Then choose the “Setting” option
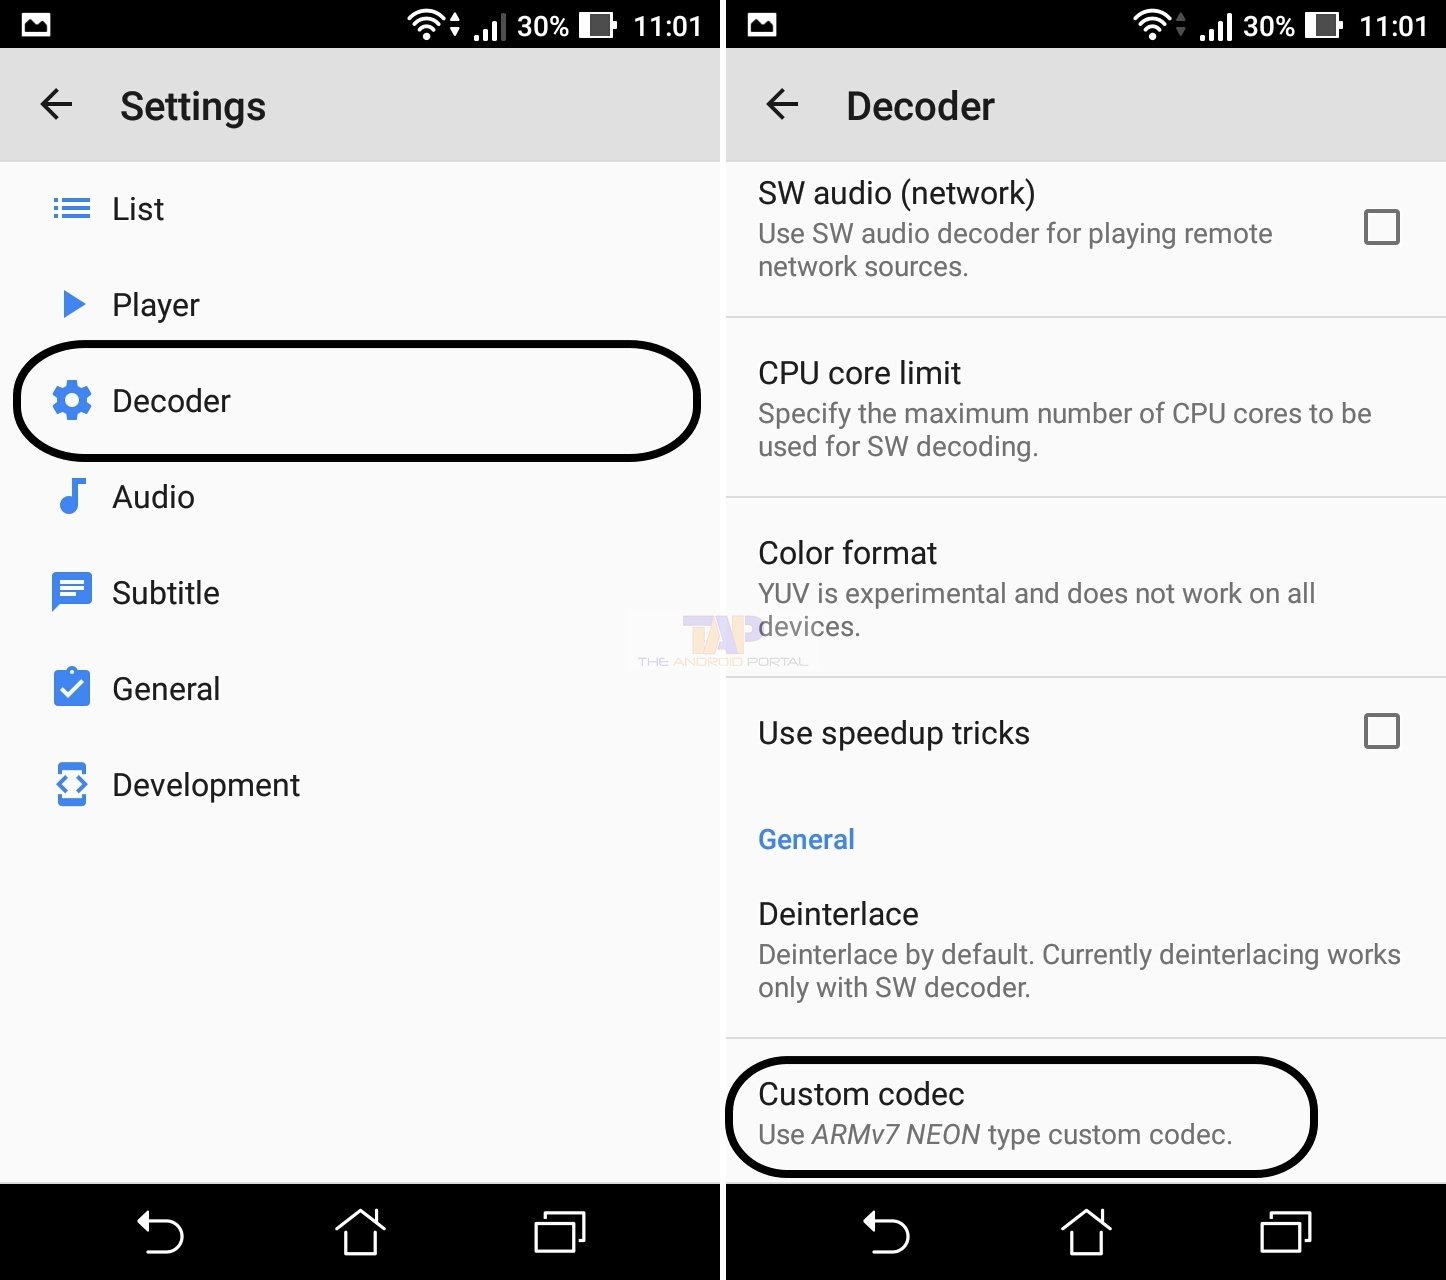
- In the setting, click on the “Decoder” option
- Scroll down to the bottom to see your Custom Codec version
Here we have a simple method to add a Custom codec to MX Player. This approach doesn’t have to move or copy to internal storage. Now follow these simple steps to add Codec quickly.
Open the Download link using the Chrome browser on your Android phone. You can download your MX Player AC3 Codec From here.
Note: You must download this Custom codec using your default browser on Android.
- After downloading your suitable custom codec on your Android phone
- Tap on the “MX Player” icon to open it
- Now MX Player automatically detects the custom Codec
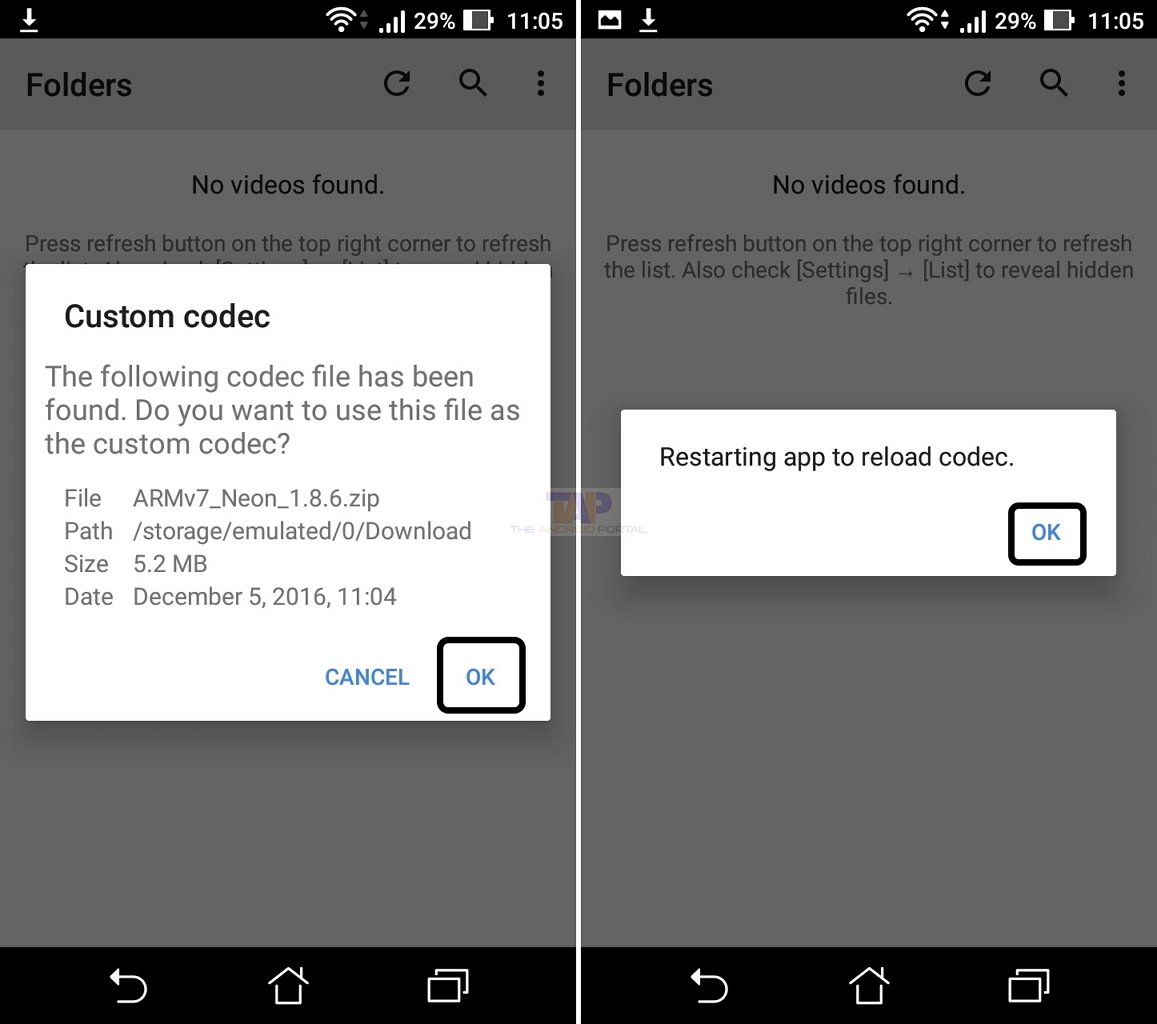
- You have to click on the “OK” button to confirm the action
- Click on the OK button to Restart the MX player
After following those steps, Custom Codec was Successfully installed on the MX player.
How to check the Custom Codec installed on your MX player?
To check whether your custom codec is installed, follow these simple steps. If the Custom Codec is installed successfully, it can be seen just like the screenshot below.
Open the MX player on your phone and go to the Menu, then choose the Help and About options.
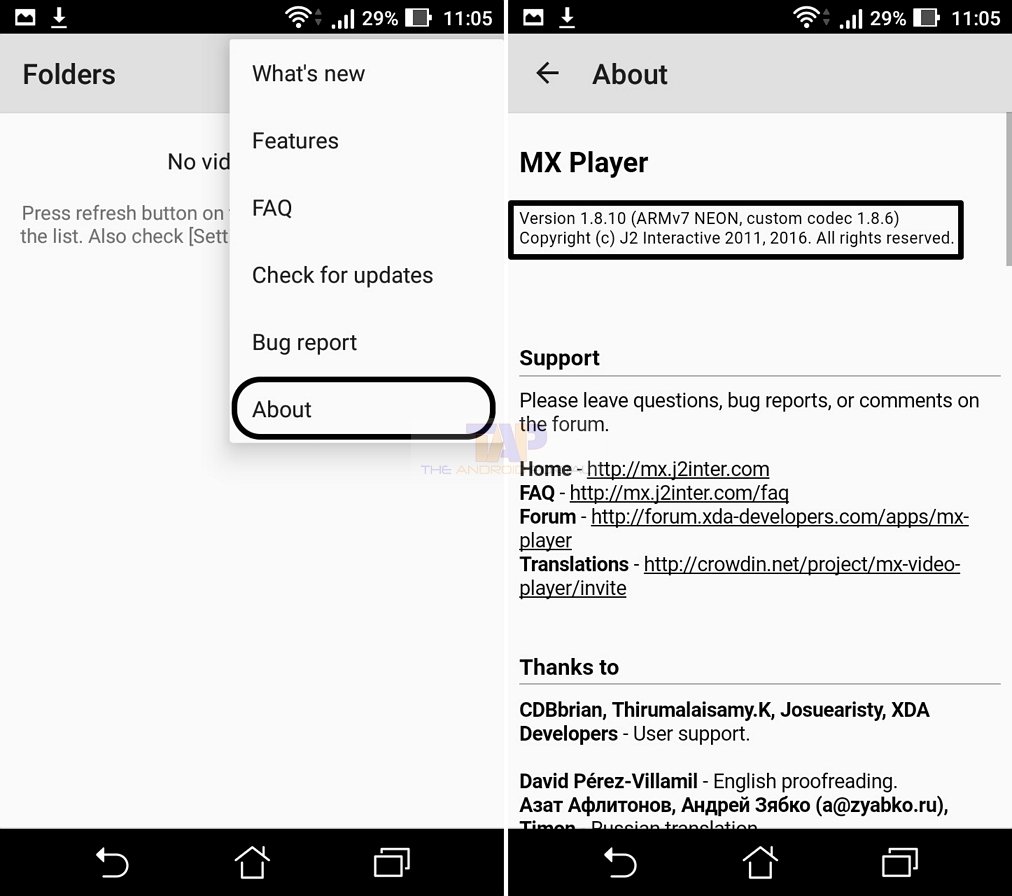
Path: Open MX Player >> click on Menu >> choose Help >> then click on the About option.
We hope you enjoyed reading this article and that this step has fixed your MX player codec issues.
If you have any questions, feel free to share your thoughts in the comments below.
